How to easily debone herring: we reveal all the secrets
Having decided to prepare a dish of salted herring, the housewife certainly asks the question: how to clean the herring. And this is quite logical - no one will like the crunch of bones in a salted fish appetizer. By the way, there are a great many recipes with salted herring. This includes the famous herring under a fur coat, mincemeat, and fish rolls. So it's time to learn how to separate bones from meat and cook fish fillets in minutes.
Why clean the herring yourself?
The first step in a recipe for any salted fish appetizer is to clean it from the bones or immediately recommend taking ready-made fish fillets. But really, maybe it would be better to just go to the nearest store and buy fillet in oil or mayonnaise? Then you don’t have to learn how to properly peel a herring! I opened the jar, cut the fish - and the bottom layer of herring under the fur coat is ready.
Not a bad option. But homemade fillet is still better. There are several reasons for this:
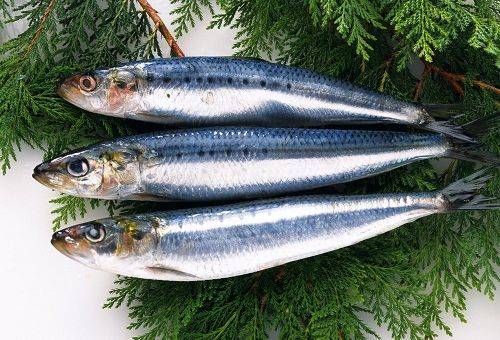
- When buying a whole fish, you can smell it and check it for freshness “by eye”.
- Unscrupulous producers may use low-quality, and sometimes even “lost” fish to prepare fillets.
- There is an opinion that to remove the smallest bones from fish, chemical compounds are used in which it is soaked. As a result of this treatment, the bones literally dissolve.Large producers have repeatedly denied such information, confirming their words with a video of the fillet production process. However, unscrupulous manufacturers who do not value their own reputation may well use this method.
- Buying a whole salted herring will be much cheaper than buying ready-made fillets.
Five useful tips for cleaning herring
- Before you start peeling salted herring, prepare a sharp knife. If a kitchen knife becomes dull, it should be sharpened. This must be done, since a convenient, impeccably sharpened knife is the first rule that allows you to quickly clean herring.
- Often you have to clean the fish shortly before guests arrive and there is simply no time to wash your hands after cleaning. And the smell of salted fish is very corrosive. To be sure to solve the problem of unpleasant odor, wear plastic or thin rubber gloves to avoid getting your hands dirty. To protect your clothing, be sure to wear an apron.
- Although each type of food should have its own cutting board, there is nothing pleasant about a board that smells like fish. Therefore, protect not only your hands, but also the cutting board from the smell and particles of fish fillet. Place a thick layer of white paper or cling film on it. After completing the procedure for gutting the salted herring, the paper (film) can simply be removed from the board, wrapping the entrails, bones and other waste in it, and discarded. The next step should be carried out on a new, clean sheet of paper. After cleaning the fish from the bones, the paper should be discarded, and the board should be wiped with a sponge soaked in dishwashing detergent and rinsed with warm water, rather than scrubbing off the specific fishy “aroma.”
- If the measures listed above did not help on your hands or there is fishy amber left on the cutting board, sprinkle them with lemon juice.
- If the fillet is not used immediately, store it in the refrigerator wrapped in cling film.
Two ways to turn herring into fillet
The salted herring has been purchased - it’s time to learn how to clean the herring. There are 2 ways to do this. The fundamental difference will be the moment of separation of the bones from the meat. In the first option, the fillet is slowly and carefully separated using a forward movement of the thumb along the ridge, freed from the skin, and in the second option, the ridge and rib bones are separated from the meat in one movement. The second option looks more impressive. It is usually used by professional chefs. Let's take a closer look at both options.
Preparing the herring before directly separating the bones will be the same for both options.
- Wash the herring under running water.
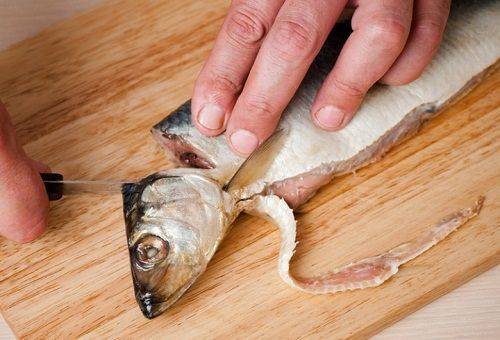
- Cut off the head.
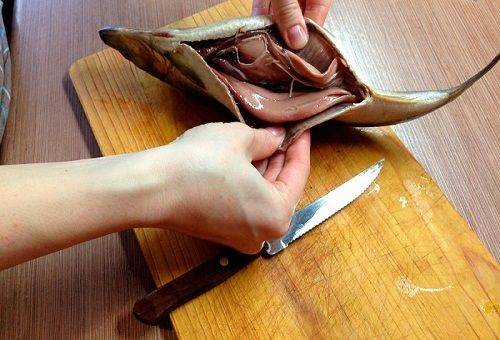
- Cut the belly from the head to the tail.
- Remove the lower fins (ventral and anal). After the fish is cut along the belly, they are easily removed.
- Remove the giblets from the cut belly. If the herring turns out to be a female, you can put the eggs in a separate plate. You can make delicious sandwiches with it by spreading the bread with butter and placing salted caviar, freed from the press, on top. The remaining offal, including milt (if a male is caught), should be thrown away.
- Gutted herring must be washed. Dark films should be carefully peeled off with a knife. After making sure that all the insides have been removed, you should rinse the fish again and then move on to the next step.
- At the very bottom of the belly, on both sides of the gutted fish, a strip of meat should be cut off.In this place there are small bones that cannot be removed otherwise; they can only be cut off along with the meat.
- Make a cut along the ridge from the head to the tail. Cut out the dorsal fin along with the small bones where it attaches.
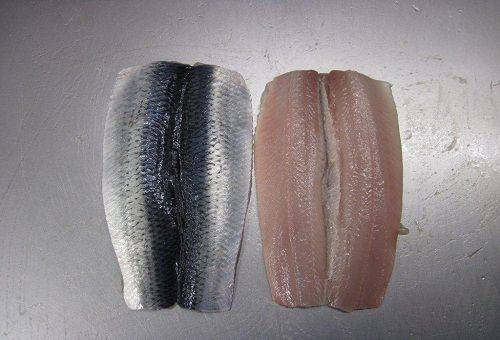
- Use a knife to pick up the skin and remove it from the herring carcass. It is convenient to do this from top to bottom.
The herring is prepared. Now comes the fun part - separating the meat from the bones. In the first option, you should do this:
- Cut off the herring's tail.
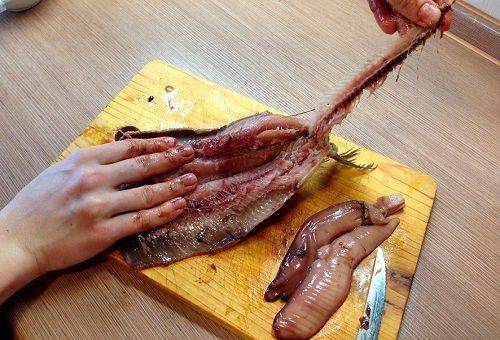
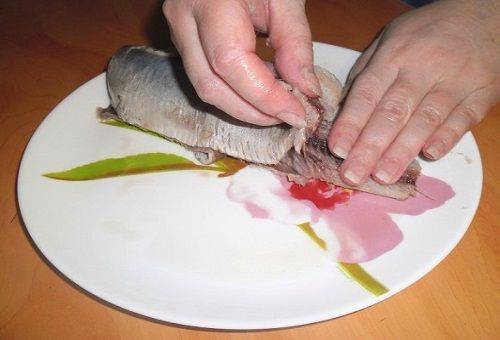
- Take the herring in your right hand (for left-handed people - in your left). Place your thumb on the ridge at the base, placing it under the meat, and begin to move your finger towards the tail, moving the meat away from the skeleton. When your finger reaches the tail, remove the fillet portion completely from the rib bones. The result should be half a clean fillet and half meat on the backbone and ribs.
- Separate the meat from the backbone and rib bones from the other part of the carcass in the same way.
- If there are bones visible to the eye, usually there are not many of them - 3-4 long bones, no more, remove them.
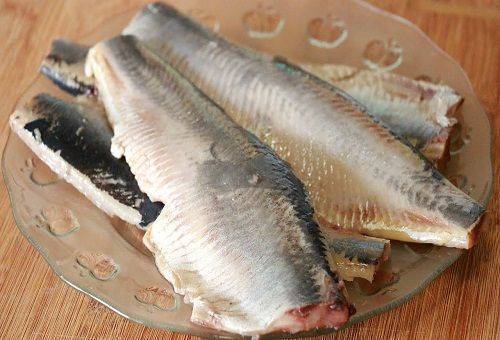
- Fish fillet is ready!
In the second option, which allows you to quickly get the fillet in one movement, you need to do the following:
- Grasp the fishtail with your hands: with one hand on one half, with the other on the other.
- Make a circular movement with the fish in the direction “away from you” or “counterclockwise”, and when the herring approaches its original position, tear it into 2 halves, pulling the tails in different directions.
- The result is one half of a clean fillet, with which you only have to cut off half of the tail. And from the other half you should take out the bones, holding the ridge, and also remove the rest of the tail.
- If any bones still remain, remove them.
- Salted herring fillet is ready!
Be sure to try peeling the herring with your own hands (or your husband’s hands) and make sure that it is not as difficult as it seemed at first. Don't save time on cleaning herring by buying preserves. They are significantly inferior in taste and quality. The health and well-being of loved ones is much more valuable!
We recommend reading the article: how to clean crucian carp
Oh well... I already knew everything. I'm interested in how to get rid of small bones...
I support the comment above... this information is more likely for schoolgirls... but how to remove small bones from a fillet without it turning into dust?.. even using tweezers... the bones tear the meat so much...
When I got to the place where they write to throw away the milk, I didn’t read any further, this nonsense was written by narrow-minded people, dislike for you.
I support Alex!