How to close pipes in the toilet and bathroom: 5 original ways
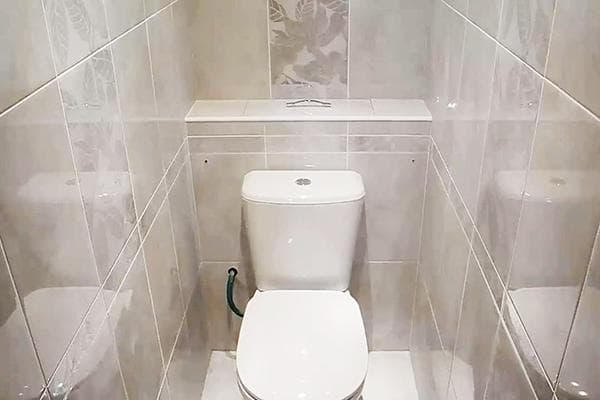
To help you hide the pipes, completing the job in the shortest possible time, spending a minimum of money and not depriving yourself of access to all elements of the water supply and drainage system, we asked professional builders which options seem most successful to them. This is what the experts told us.
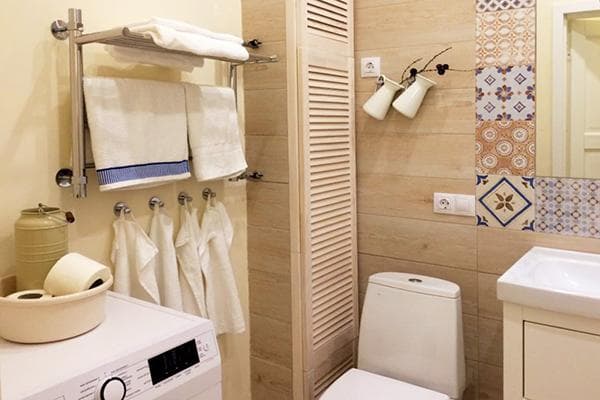
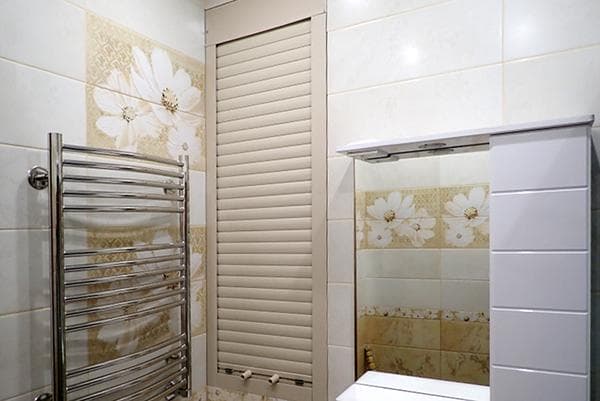
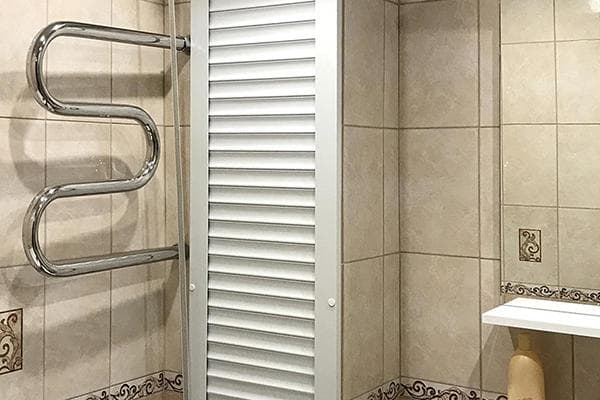
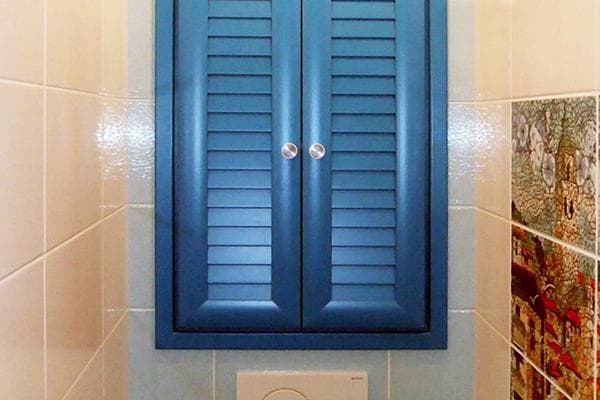
Blinds or roller blinds
This option is not yet often found in Russian interiors. It’s a pity, because it satisfies all the requirements that homeowners focus on:
- Decorative design. Now you can order blinds and roller blinds of any color, made not only of plastic, but also of wood or aluminum. Whatever your design idea, you can easily implement it.
- Unobstructed access to pipes and meters. It is enough to lift the blinds or curtains up with one movement of the hand.
- Easy installation and dismantling. Having basic skills in working with a screwdriver and other tools, a person can do this work with his own hands in a matter of minutes.
As a rule, roller blinds and blinds cover pipes located in a niche. This is what it looks like:
Since the toilet and bathroom are rooms with high humidity, only sanitary blinds and roller shutters are used there. They differ from ordinary ones by the presence of a special coating that is resistant to steam. In addition, they are not damaged by fungus.
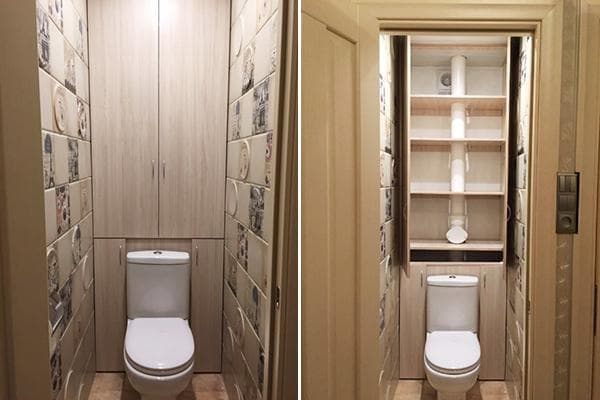
Household cabinet
In a large apartment there is no need to save every square centimeter, but homeowners with a small area try to effectively use all the available space. Therefore, they will definitely like the idea of equipping a household cabinet behind the toilet - you can store detergents, washcloths, rags and other household equipment in it. And if you fasten the shelves more securely, then cans of preserved food will fit on them.
To build such a household cabinet, you will not need complex drawings and calculations, nor a bunch of special tools, nor expensive materials:
- The doors can be made from ordinary laminated chipboard by ordering the material to be cut in the store according to the measurements you made in advance. In this case, it is advisable to laminate the sections - this will add aesthetics to the doors, and at the same time extend their service life. There, in the store, shelves will be cut from the material you choose.
- It is not necessary to do the back and side walls of the cabinet. If you are limited in time or want to cut costs as much as possible, simply attach guides to the walls that will hold the shelves.
When calculating the usable area of the cabinet, remember that the space above the tank and on the sides of it can also be used. And when designing shelves, don't forget about the cutouts for the pipes. The wood should not come close to the pipes, so also include indents in the drawing - 1–1.5 cm on each side.
Such a cabinet is suitable only for separate bathrooms, since when residents take a shower or wash in the bathroom, a lot of steam is generated in the room. Wood absorbs it and swells, and then dries and decreases in volume. Constant fluctuations in humidity negatively affect the condition of the material and can cause mold.If you still want to make a household cabinet in a combined bathroom, take care of good ventilation.
Collapsible box with magnets
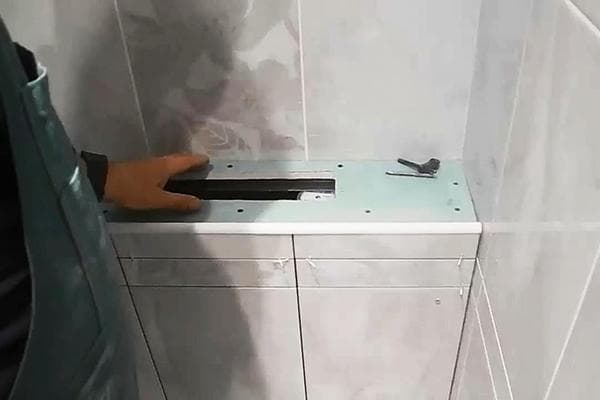
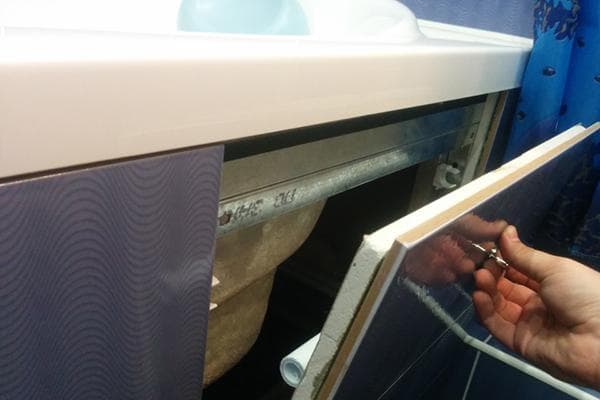
It's possible that blinds and cabinets aren't your thing. If you need a very ordinary box, but the prospect of breaking the structure in case of a leak scares you, consider the option of a collapsible box. It is designed without any special tricks:
- The frame is assembled from galvanized metal profiles using self-tapping screws.
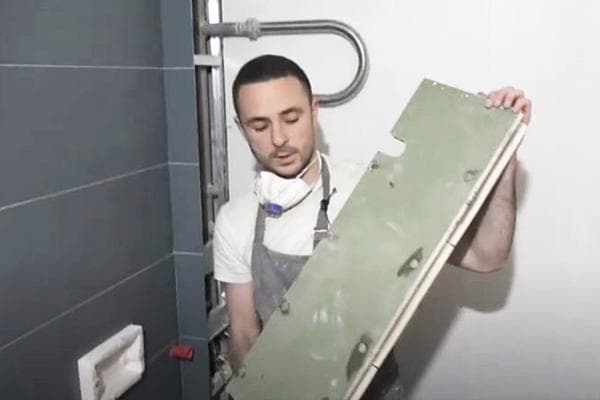
- The tiles are glued to drywall.
- Holes are drilled in the drywall for neodymium magnets (the minimum magnet size is 2 cm in diameter and 3 mm in thickness).
For rational reasons, you should not attach each tile separately with magnets. Calculate where it is convenient for you to make a large inspection hatch that gives access to the main communications (collector connections, meters). Also mark the places where small hatches should be located for detailed inspection of the pipes.
For those who do not know that this is a box, when assembled the structure looks like an ordinary wall. But if necessary, you can disassemble it in a matter of minutes, and then just as quickly install all the elements in place. By the way, not only boxes, but also screens for bathtubs are made using a similar principle.
The only problem with such boxes is their leakage. To prevent moisture from seeping inside and causing mold, all joints between the tiles should be filled with transparent sanitary silicone sealant, and after drying, cut the resulting seams with a sharp painting knife. However, you cannot remove the tiles often - because of this, the silicone will eventually fall into the seam.
Another option for sealing joints is to use classic grout.Before removing the tiles, the grout will need to be removed, and after installing the tiles in place, the grouted joints will need to be restored.
Decorative camouflage
Perhaps all the methods mentioned above will seem complicated to you and you will want to know how to disguise pipes more easily - without selecting building materials, without assembling any structures and spending a minimum amount of money. Well, this option also exists, and to implement it you will only need brushes, paints and a good imagination.
There are several color masking options:
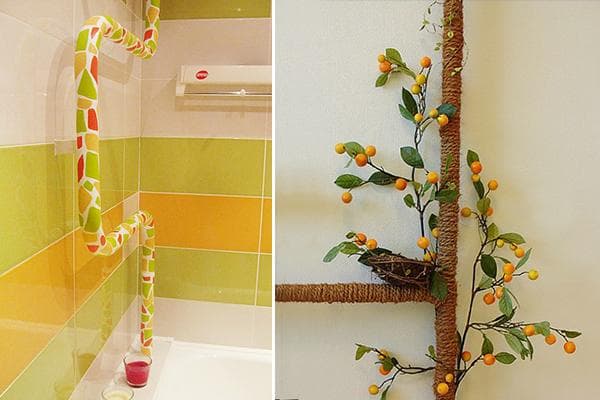
- Tone on tone. This means you need to paint the pipes to match the color of the tiles or paint on the walls. If there are patterns on the tiles (spots, stripes, geometric shapes, etc.), they will also have to be repeated. The situation is similar with gradients. The final result largely depends on your skill and correctly selected shades.
- Decor. If you don’t want to hide the pipe, but on the contrary, want to turn it into a work of art, this option is for you. Here you will have unlimited space for creativity. For example, using white and dark gray paint you can paint a riser hidden in the corner under the trunk of a birch tree, and depict branches and leaves on the wall. Or wrap an improvised trunk with artificial greenery. It’s just as easy to turn the riser into the neck and front leg of the giraffe (the body of the animal and the rest of the legs will be drawn on the wall).
This method, although it does not require construction skills, time expenditure and large finances, is not suitable for everyone. You must have artistic taste and a sense of beauty so as not to make it even worse than it was before the work began.
Grilling
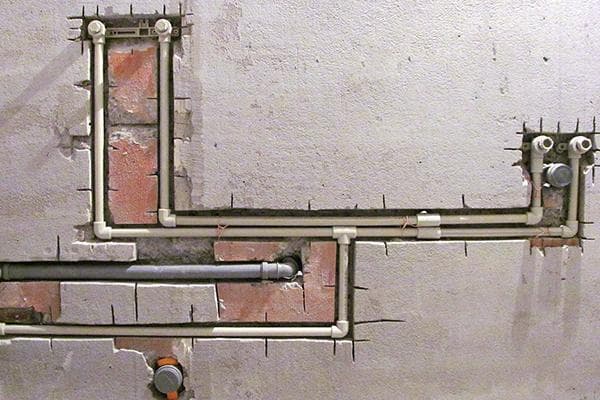
The previous options were suitable for sewerage and wastewater systems that are already installed. In this case, you should think about hiding the pipes from the eyes of residents and guests at the very initial stage of repair. This is because gating involves hidden pipe routing. Using a wall chaser or other suitable tool, you need to make grooves in the walls - the pipes will be recessed into them. For greater safety, the pipeline is carried out exclusively in a straight line, and all connections are made permanent (soldered). Next, the walls are lined with any material you like, but it is desirable that the decorative cladding is easily removable. Using this method, pipes can be closed in the bathroom and toilet.
Please pay attention to an important nuance: gating will not suit you if there are load-bearing walls in the bathroom or toilet (their integrity must not be violated). In addition, it is forbidden to make grooves where electrical wiring passes.
Questions and answers
Is it worth making a collapsible design? Pipes do not leak very often - by the time this happens, the time for a new repair will approach and it will be possible to break the old pipe without regret.
Such a nuisance can happen not only to you, but also to your neighbors. Moreover, sometimes those sections of the pipe that are located inside the ceilings leak. Replacing a riser will most likely affect not only your neighbors, but also you.
Why can't the inspection hatch be made larger? This would completely solve the problem.
For people who are not directly involved in repairing the water supply system, it seems that a standard hatch is enough to carry out any work.But in reality this is not the case - try sticking a large tool (for example, a grinder) through the inspection hatch and at the same time try to operate it not by touch, but by carefully observing the process. You won't succeed. Also, do not forget that if a pipe or section of pipe needs to be replaced, it will also need to be pushed through the hatch, and there is not a single David Copperfield among the plumbers.
Now you know how to close pipes in a bathroom or bathroom. The options suggested by the builders are suitable for everyone who makes repairs with their own hands. However, in order for the result to be not only practical, but also pleasing to the eye, you should work very carefully and carefully select materials according to color, texture and other parameters.
I have a cabinet in my dressing room. Quick and easy access to all water supply and sewerage devices.Well, for storing all sorts of detergents there.
ships have cabinets with removable shelves for storing detergents, household chemicals and small items for the household.
All pipes should be open so that in case of the slightest accident there is access, I think so.
I bought an apartment. Behind the toilet, the pipes were covered with tiles, as in the photo. When the sewer pipe between me and the neighbors below burst, I had to break the tile behind the toilet too. And everything there is black, fungus! It’s better not to cover it with anything, but to paint it beautifully or replace it with plastic.
No, it’s better to break it down and then make it, painting and roller shutters, it looks like a farmhouse, ugh, not relevant
hanging a beautiful curtain without any hassle—the pipes must be accessible—easy and simple!!!
I covered the recess with the pipes with a plastic sheet under the mosaic. Held on with double-sided tape. The price of the sheet is 100 rubles. It turned out beautifully and easy access to the pipes was provided.
What a horror, where did you see the beauty here?
Not everyone here understands that pipes do not need to be closed; sometimes even the repairman does not warn.
of course.. this is all good.. I did this myself.. but who can tell me.. how to close it... or with what to close it... or not to close it (whichever is good)... if there is a pipe, weave... and the heating pipe runs in the middle of the bathroom ?...I can’t imagine...how to hide it...the pipe comes from the boiler, right in the middle of the bathroom and goes through the rooms (private house)...the bathroom is about...4x4...?
Raise the floor?
Pictures in the toilet are already too much, in bad taste. On magnets it’s basically new, can you give more details?
Based on your interesting examples, I got my own ideas. Thank you!
Why close them at all????? Especially like our upper “cool” neighbors, they closed the pipes and don’t see that the pipes are leaking.
We also closed everything down, and next year the replacement is underway due to major repairs, they are already whining that they won’t give access and won’t let us break it, but why bother walling it up. We hung the blinds, metallic, ordered the color of the tiles on the wall, black and white, horizontal, it looks good, the other day the counter went wrong, we need to change it, no problem, the blinds were raised and that’s it. There’s a niche there, they made shelves for crap.
Hello village, that's what it's called
Once I lived in a service apartment and needed to close the pipes for a while and without investment. I screwed a wooden block on both sides and glued the remaining ceiling tiles onto them (covering the pipes underneath). Then these tiles were covered with wallpaper, which was also used to cover one of the bathroom walls. It turned out nice and almost free. And it’s not a pity to remove them at any time.
We have a new house and everything that is poured into the sewer pipes is very audible, so my husband made a removable box from plasterboard and by unscrewing 10 screws, you can easily at least change the pipes. Mortise hatch, frame color matches the color of the walls.
I liked the option with a box with magnets. I'm thinking about making one for myself. And there will be access to the pipes and it will look good