How to store gladioli in winter so they don’t disappear and bloom beautifully
Content:
Happy owners of sword bulbs should know how to store gladioli in winter, so that next year they will delight you with arrows of flowers. These are not easy flowers to propagate. If the bulbs are not dug up, the plants may not survive the winter. Gladioli that have not overwintered well in the ground dry out, are affected by diseases during growth, or do not bloom. And the cockchafer larva also likes to eat them.

How to prepare gladioli for winter
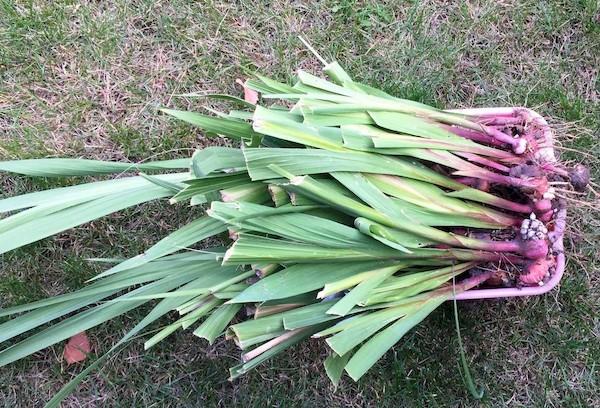
Preparation of gladioli for winter will begin at the end of summer, from the flowering period. As soon as the buds bloom, the flower arrows need to be cut off and continue to admire them in the vase. Then the tubers will have time to accumulate a lot of useful substances, and they are guaranteed to bloom next year.
The note. How to prepare gladioli for winter: cut off the peduncle after flowering so that the bulbs ripen well.
For better quality of bulbs, you can fertilize with special fertilizers for bulbs. A simple and almost equally effective fertilizer is ash. Pour a glass of ash into a bucket of water and stir. Pour 1 liter of solution under each plant.
When and how to dig up gladioli for the winter
Gladioli bulbs are dug up 30-40 days from the start of flowering.You can do this later, but not earlier. The exact timing depends on the region and climate.
If the gladiolus bloomed in August, it is correct to dig up the bulb in September.
After flowering, a new bulb grows, day by day it increases in volume. Then children are formed. It happens that gladioli bloom late, already before frost. It's okay, it takes time. Gladioli can be dug up both in October and November, when it gets completely cold. The main thing is that the ground has not yet frozen to a depth of 10 cm.
What to do with gladioli:
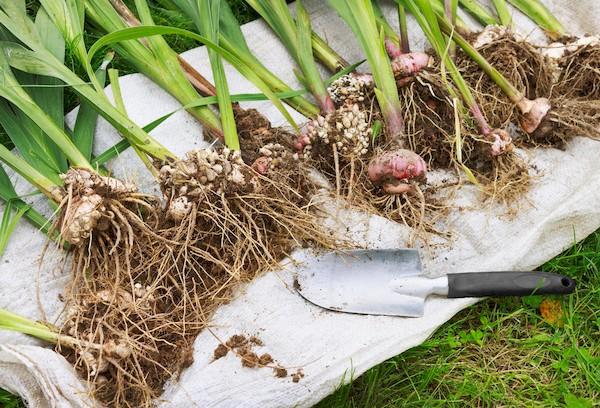
- Dig up flowers. Carefully dig up the bush, pry it with a fork and pull it out of the soil, grasping the green mass. Usually gladioli are dug up 2-3 days after rain, when the weather is dry but the soil is still loose.
- Remove dirt (lightly dry, do not wash).
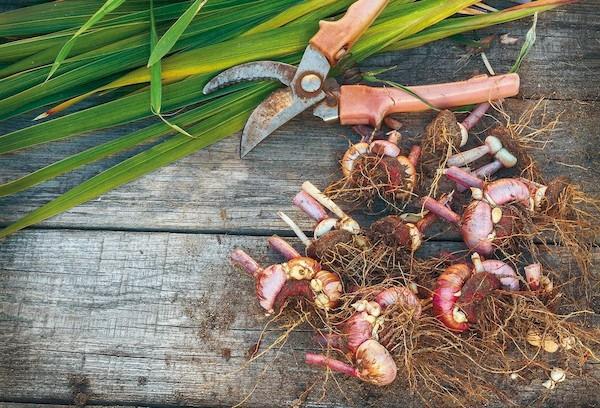
- Break off stems or cut with disinfected garden shears. There is no need to leave stumps; thrips can overwinter in them.
- Separate the young onion from the old one. Sometimes it rots in the ground, but more often it is preserved.
- The old onion is dark in color, not so elastic, wrinkled.
- You can simply twist it if it gives in easily. If not, use a sharp knife. Carefully cut out all the old part, leaving nothing behind.
- The next item is optional. You can soak the bulbs in a disinfectant solution, or not. The advantage of soaking is to minimize the risk of diseases, as well as overwintering of pests. The downside is that the tubers take a long time to dry out and can rot if they are not dried well.
- For gladioli, the preparations Fitosporin, Maxim, Trichoderma veride, manganese solution, and boric acid are used. First, you need to fill the bulbs with cold water, and when the dirt gets wet, rub it with your hands. Drain dirty water.Prepare a solution of Fitosporin (another drug) according to the instructions. Immerse clean onions for 30 minutes. Do not rinse off the solution.
- Air dry the planting material in the shade. The approximate drying time is 2 weeks (after soaking 4 weeks). The temperature regime is changed 2-3 times. Wet tubers are dried near a radiator or heater at a temperature of +30...+35 degrees for 1 week. Dry tubers are left for a week outside or indoors at +20....+28 degrees. The last week the corms need to be adapted to a temperature of +15...+18 degrees.
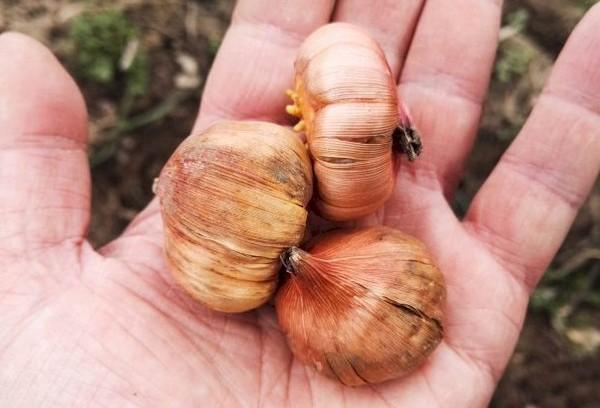
- Dry, relatively clean bulbs with short roots and without stems (short stumps are possible) are considered ready for storage. Scales should be present in small quantities.
Advice. As you dig up the bulbs, look for lots of small white or brown shoots. These are mini-bulbs, from which new gladioli will appear next year or the year after. Try to save them, and instead of one flower you will have ten.
How to properly trim gladioli for storage, look at the photo:
Storage conditions
Optimal conditions for storing gladioli bulbs in winter:
- ventilated room;
- temperature +3…+9 degrees;
- low humidity;
- darkness.
Gladioli bulbs at home may disappear or germinate ahead of time if the room is too warm, damp, or light. It is necessary that they do not wake up for as long as possible (“sleep” at least until the end of February, and preferably until the end of March).
How to store gladioli
Those who have been growing flowers for more than one year insist that when gladioli of different colors are stored in one box, they bloom in one color.
Experienced gardeners use individual containers to store white, orange, purple and other gladioli flowers. Each container must be labeled (color, variety name, if known).
How and in what is the best way to store gladioli before planting:
- In shoe boxes. Lay out a layer of onions, cover with paper, then another layer, again with paper, etc.
- In nylon tights or shoe bags. An old method that has not lost its effectiveness today. Old nylon bags are tightly stuffed with dry bulbs or “breathable” bags are used to store shoes.
- In cardboard egg containers. This packaging helps to better preserve the bulbs. They don't touch each other. If one disappears, the others remain intact.
- In mesh boxes. A large amount of planting material can be stored in mesh boxes for vegetables. Fill containers no more than two-thirds full, and inspect the bulbs monthly for spoilage.
Bulbs should not be stored in plastic bags or sealed plastic containers. They do not allow air to pass through. In winter, living tubers “breathe” and release a small amount of moisture, which should evaporate naturally. If this does not happen, mold forms and harmful bacteria become active.
Where to store gladioli
In winter, dug up gladioli bulbs are well stored in unheated and relatively dry rooms: garage, cellar, warm shed, where the temperature does not fall below +3 degrees and does not rise above +9 degrees.
Where can you store gladioli in an apartment:
- On a glazed unheated loggia or balcony. This is usually the most suitable place in the home, the coolest.Bulbous plants can be hung in tights or used shoe boxes and paper.
- In a refrigerator. A small number of gladioli can be stored in the refrigerator. The drawer area is best suited for them. To prevent the bulbs from rotting, wrap them in newspaper, office or other paper. Store separately from vegetables and other foods.
- In a clay shell. In a warm apartment, the following recipe will help you preserve the bulbs correctly: make a clay mash from 1 kg of clay and 2 liters of water. The clay should swell. The result will be a mixture with the consistency of thick sour cream. Dip each onion (already prepared) into it and dry.
You can leave gladioli in a clay shell in a box on the floor under the bed, on the bottom shelf of the closet, where it is coolest and darkest. You can also use boxes filled with dry sawdust for storage in the apartment.
Question answer
The bulbs have become soft, why and what to do?
Loss of elasticity is a sign of spoilage or rapid germination. If the bulbs become soft in the fall or early winter, most likely they were poorly dried, exposed to sunlight, or stored at the wrong temperature. It is necessary to remove damaged specimens, and those that appear normal should be placed in better conditions and inspected regularly.
Why don't gladioli have babies?
There are several reasons for the absence of small onions on a large onion. The first is a “young” variety. The second reason is landing at great depth. If you plant gladiolus at a depth of 15-20 cm, it becomes difficult for it to form children. To multiply gladioli, plant the bulbs in holes 10 cm deep.
Some gardeners doubt whether it is necessary to dig up gladioli bulbs for the winter.Yes, yes, and yes again! This is not a winter-hardy plant that does not tolerate wintering well in the soil, even in the south of Russia. When there is frost -5...-7 degrees, the flowers die, and in the spring there are very few or no shoots. To make gladioli happy for many years, take the tubers with you. They “sleep” at home until spring, and then begin to awaken. They are returned to the ground noticeably sprouted. Planting is planned after warmer weather sets in, around May.


