6 secrets of polyurethane foam: I share the best lifehacks
Legend has it that with electrical tape, wire and foam, you can complete any household repair. I haven't checked whether this is true or not. But each of the materials mentioned is good in its own way and in certain situations simplifies the elimination of breakdowns. We'll talk about electrical tape and wire some other time, but today I'll share with you tricks in using foam - they have served me well more than once. Perhaps they will be useful to you too.

1. Storing a started foam container
Many people think (and I once thought so myself) that a started container of polyurethane foam should be used immediately. But in fact, it is not disposable, and if you properly prepare it for storage, it will serve you for at least a month, at least a year.
Everything is done simply:
- After work, turn the cylinder upside down and, holding it in this position, bleed off the gas a little. Thanks to this procedure, the nozzle will be cleared of any remaining foam.
- Remove the tube along with the gun and pour a couple of drops of acetone into it, which will dissolve everything that is stuck.
- Insert a self-tapping screw 23–30 mm long into the nozzle. It will not allow air to penetrate inside, and accordingly, the contents of the cylinder will not harden.
When the need arises to use foam, remove the screw, put the tube and gun on the cylinder. And after completing the work, follow the above instructions again.
2. Removing foam from various surfaces
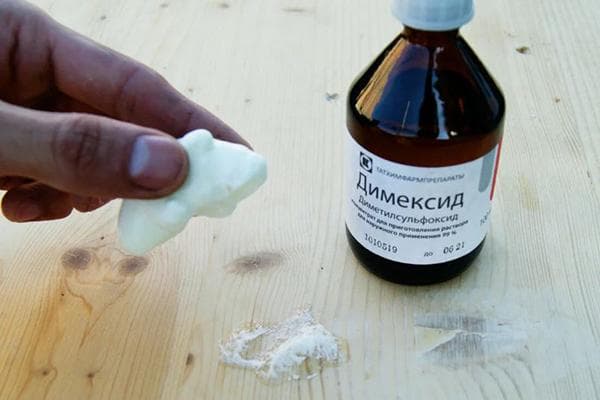
One day I carelessly placed the cylinder on the windowsill and left.During my absence, the remaining foam in the tube expanded and the pressure pushed them out - straight onto the new parquet. When I returned, I saw this and for some reason panicked - without waiting for everything to dry, I began wiping the parquet with the first rag I could get my hands on. This did not lead to anything good - the foamy slurry was smeared over an even larger area of the floor.
And then I remembered about dimexide, which had been lying around in the medicine cabinet for a long time. From a medical point of view, it is a cheap and effective anti-inflammatory agent, and from a chemical point of view, it is also an excellent solvent. Therefore, without delay, I soaked a napkin with dimexide and began to scrub the parquet. After two or three minutes there was no trace of foam left.
By the way, acetone and any products containing it (for example, nail polish remover) will also help to “cover your tracks” after working with foam. So don’t rush to get upset if your floor or other surface gets dirty—you won’t have to spend money on special cleaning compounds.
And if your skin gets dirty, then how to wash foam from hands? Here, too, at first the rule works - do not smear the foam on your hands; it is better to remove it with a clean cloth or damp cloth.
3. Filling the space under the roof with foam
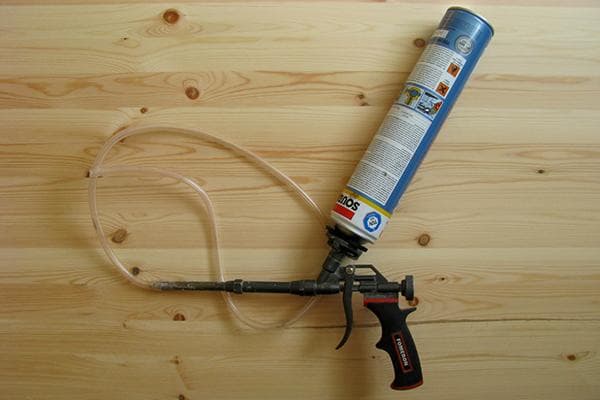
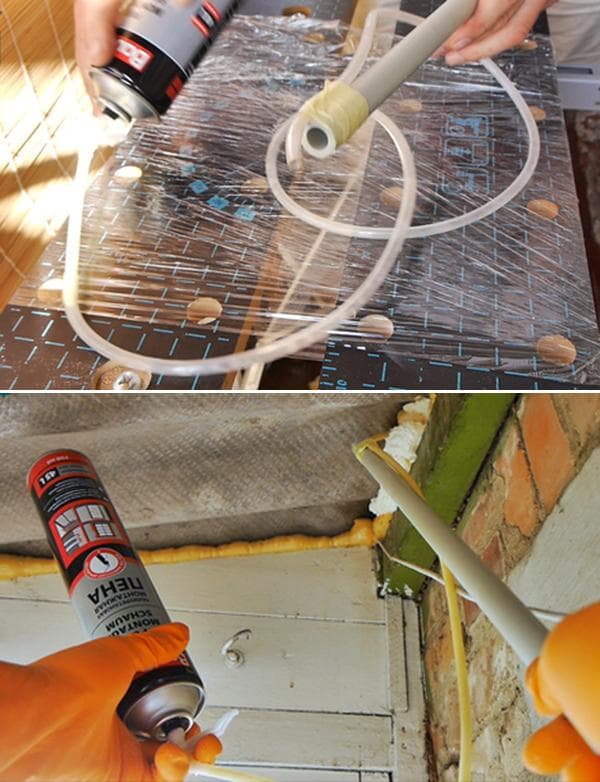
In order for the foam to come out of the container well, it must be held upside down. But how to do this if there is a need to foam a gap under the roof? I wondered about this question for a long time, until one day I learned about a life hack with a long tube. If you want to use it, do this:
- Find a thin, flexible tube that is large enough to fit over the main nozzle tube.
- Connect these two tubes.
- Attach a handle to the free end of a long tube (for example, by wrapping it with masking tape).
That's it - the device is ready for use. Simply place the tube in the desired location and turn on the foam supply.
4. Replacement for a lost cylinder tube
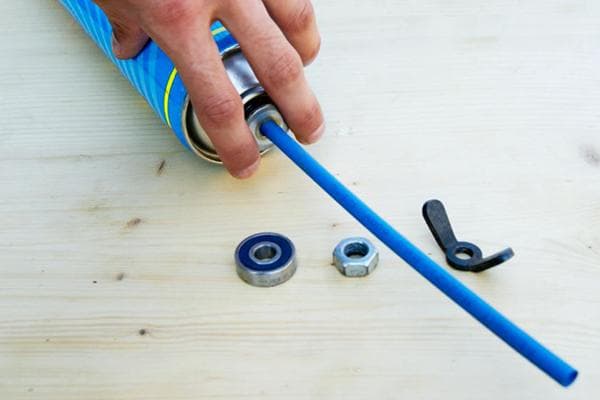
It is impossible to work with foam without a tube attachment for the cylinder. But it often gets lost and, as a rule, I discover it at the most inopportune moment, when it is not possible to go to the store. The first time this happened, I was forced to go to a neighbor and ask him for a spare tube. The neighbor didn’t have one, but he suggested an excellent “substitute” option - a heat-shrinkable tube. It is enough to put it on the nozzle and warm it up so that it is fixed well.
And to make it convenient to press the button, you should use a regular washer, putting it on the tube and moving it down.
5. Filling large holes with foam
Sometimes you have to foam holes of large diameter. If you've ever done this kind of thing, you know that this is not easy to do - the foam does not want to stick to the top and side surfaces, but instead falls down under the influence of its own weight and gravity.
To avoid wasting time and consumables, I use the following life hacks:
- Hydration. After filling a small part of the hole, I spray the area with water from a spray bottle. Since the foam polymerizes precisely upon contact with moisture, an additional portion of H2O significantly speeds up this process. In addition, the next layer fits perfectly on top and “sticks” to the previous one thanks to the same moisture. This is how I fill the hole completely step by step.
- Insert. This method is good because it not only simplifies and speeds up the work, but also saves foam.First, I cut out a kind of “plug” from any suitable material (for example, foam), the size of which is smaller than the diameter and length of the hole. Then I apply foam to the bottom of the hole, place the insert there and foam the remaining free space.
6. Gluing objects
Polyurethane foam is not only an excellent filler. It can also replace foam glue, and I always use it when I need to connect two objects made of wood, plastic, concrete, brick, metal, plasterboard or stone.
There is nothing complicated in the gluing process itself:
- Degrease both surfaces and lightly brush them with a damp brush.
- Apply a little foam to one of them and spread in an even layer.
- Quickly cover the top with a second surface.
- Clamp both surfaces in a vise or using clamps. This is necessary so that the foam does not have the opportunity to expand.
After a day or two, the vice can be removed.
Knowing these secrets, you will be able to do the job faster and save on purchasing additional consumables (the same glue or spare tubes), and spend the time and money that you managed to save on vacation.
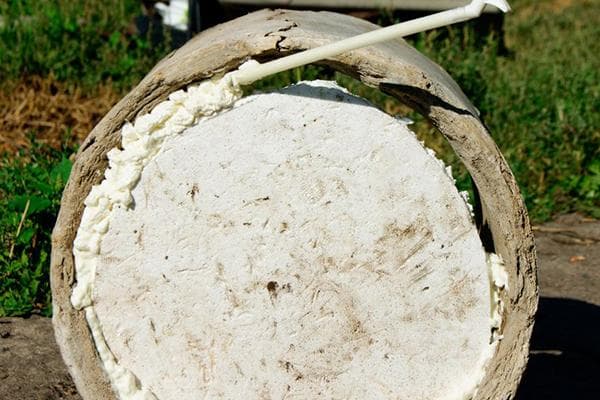
To save foam, I screw a ballpoint pen without a refill into the tube