How to properly store pumpkin in an apartment so that it does not spoil. Under the bed, in the freezer or in jars?
Content:
Delicious orange fruits can last all winter, retaining all their beneficial properties. The main thing is to store the pumpkin correctly.
Preparation for storage
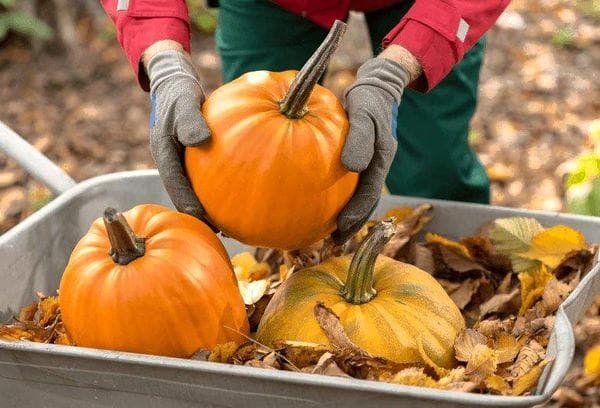
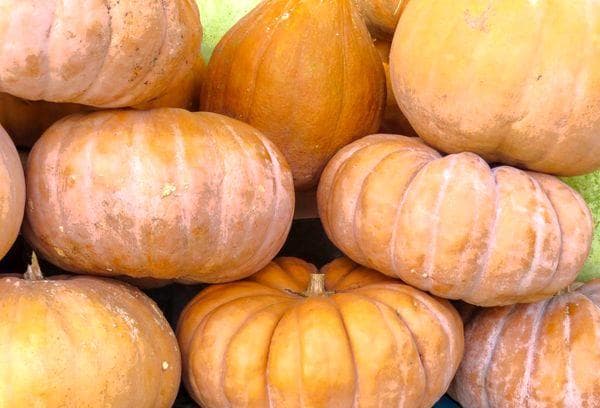
In order for pumpkins to be stored for a long time, they need to be picked together with a cutting at least 5 cm long. If you buy fruits at the market, choose the ones with a “handle”.
Wash the pumpkin in running water, preferably with detergent. It is necessary to remove not only dirt from the peel, but also pathogens.
Wipe the fruits with a towel and dry.
Take a good look at the entire crop. If you find cracks, soft areas, or spots of rot on the peel, set these fruits aside. They can be canned or put in the freezer.
Whole, firm fruits are ready for long-term storage.
Where and how to store pumpkin?
Our ancestors stored their harvests in the canopy. There was no heating in this room, but enough heat came from the house to maintain a positive temperature in the hallway.
Perhaps your house has a similar room: an outbuilding, a veranda, an unheated hallway. Feel free to put vegetables there, and they will last until spring without losing their beneficial properties.
If there is no such room, the fruits can be stored in the cellar or directly in the house.
In the cellar
Only dry, ventilated cellars are suitable for storing pumpkins. The fruits cannot tolerate dampness and begin to rot. To avoid this, place a couple of boxes of sawdust or ash in the cellar. They will absorb excess moisture from the air.
You can't put vegetables on the floor. Moisture collects there and will destroy the pumpkins. The ideal place for fruits is wooden shelves, painted or oiled.
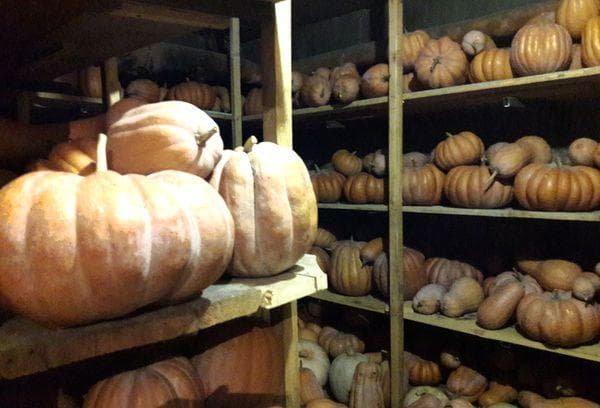
If there is no room for shelves, make a wooden lattice floor and lay it on the floor.
- Cover the surface with a cloth.
- Place the fruits in 1 row so that there is 10-15 cm of space between them.
- Every 3-4 days, turn the pumpkins from side to side so that the place in contact with the shelf does not rot. During the process, carefully inspect the crop. If you notice rot or mold, remove the fruit immediately so that it does not “infect” your neighbors.
At first, spoiled vegetables will appear frequently. Don’t be alarmed, this is normal: this is how hidden fruit defects appear. After 2-3 weeks, you will remove all diseased pumpkins, and the remaining harvest will last until spring.
Advice. Every year, treat shelves or gratings with an antifungal agent and stain them. This way you will destroy the fungal spores that were brought along with the pumpkins.
If you have created the right conditions in the cellar, the vegetables will last from 6 to 8 months.
In the apartment
Choose a well-ventilated, cool place without sudden temperature changes. An insulated loggia is suitable if the temperature there does not drop below +3-5 OC, unheated hallway, storage room with built-in ventilation.
If there are no such premises, put the harvest in the bedroom under the bed or in any suitable place away from radiators and sunlight. But the shelf life will be reduced.
Important: Do not put fruits in the kitchen or bathroom! These rooms are too hot and humid, and the crop will quickly rot.
- Make a lattice floor for the fruit from wooden slats and paint it. There should be air circulation between the floor and the pumpkins. If making a flooring is not possible, at least lay down several layers of burlap.
- Store pumpkins 10-15cm apart and rotate regularly to ensure air flow.
- Check the fruit every 2-3 days. Remove any that have begun to deteriorate immediately.
It is better to separate the fruits that were lying next to spoiled ones from the main part of the harvest. Perhaps they were exposed to fungal spores. In warmth, the rotting process occurs faster than in a cellar, so it’s better to play it safe.
In a refrigerator
Fresh pumpkin, peeled and cut into slices, can be stored in the refrigerator for about 10 days. But it makes no sense to place whole fruits there. They will take up a lot of space, and will be stored worse than under the bed.
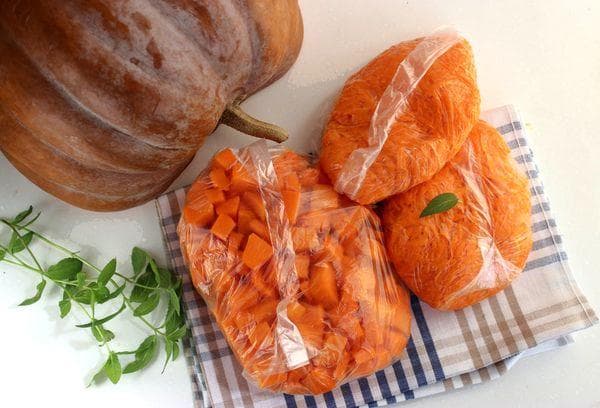
It is wiser to peel the fruit, remove the seeds and put it in the freezer. To make frozen pulp more convenient to use:
- Cut it into convenient size pieces. Small cubes are for soup, large and whole slices are for baking.
- Grate several large pieces to make a filling for pies.
- The remaining pulp can be punched with a blender and poured into containers. This preparation is useful for puree soup.
Please note: Thawed pumpkin is very soft. You won't be able to cut it; the pieces will fall apart under the knife. Therefore, think about the shape and size of the blanks in advance.
In what form should it be stored?
Are you sure you want to mess with whole fruit? It might be worth processing the pumpkin into blanks.
- The shelf life of canned food is much longer: from 1 to 3 years.
- The pulp does not spoil.
- Less hassle with cooking.Just open the jar and you're done!
- Canned food takes up less space than whole pumpkins.
- There is no need to bother with preparing the room, constantly turning over and checking the fruits.
There are many winter preparations made from pumpkin.
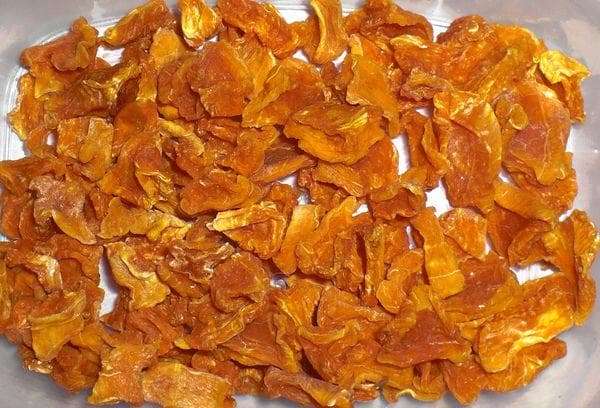
Dried pumpkin
Pumpkin is dried in the same way as apples or pears.
- Cut the fruit into small pieces or thin slices.
- Place on a flat surface with a large area. You can use trays or baking sheets, but it is more convenient to make special sheets for drying.
- The pieces are laid out so that they do not touch each other.
- In hot, sunny weather, take the pumpkin outside and leave it in the sun all day. Don't forget to cover the workpiece with gauze to protect it from dust and insects.
- Repeat the procedure until the pulp dries. This usually takes from 3 to 5 days.
To reduce cooking time, use the oven.
Important: Only those models that operate at low temperatures are suitable.
- Set the regulator to 60 OC and connect convection.
- Place the pumpkin pieces in a single layer on a baking sheet or rack.
- Place the dough in the oven for 10-12 hours. Processing time depends on the thickness and moisture content of the pieces.
There is a faster way, but this will require an electric dryer. A special technique will dry both thin plates and cubes up to 1 cm in size. Just load the pulp into the chamber as written in the instructions and forget about it. In a few hours you will take the perfect piece out of the electric dryer.
Store dried pumpkin in fabric bags. If you don't have bags, use jars or containers, just don't seal them tightly. Dried products need good ventilation.
Original idea. Dried pumpkin can be ground into powder.It is added to pureed dishes, fillings and doughs to give it its orange color and characteristic aroma.
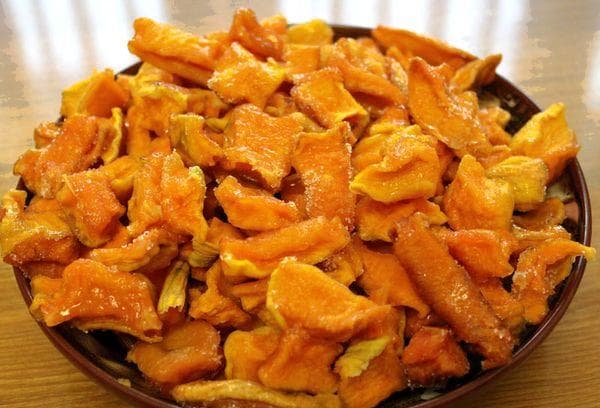
Candied fruit
If you do everything correctly, you will get delicious, healthy and completely natural candies. Candied fruits are eaten as an independent delicacy, added to baked goods or porridges, and added to muesli.
To prepare the dish, choose fruits of muscat varieties with dense, dryish pulp.
You will need:
- 1.5 kg of peeled pumpkin pulp.
- 750 g sugar.
- 1 tsp. citric acid.
- 1 tbsp. l. corn starch.
- 3 tbsp. l. powdered sugar.
Spices: nutmeg and cinnamon or lemon zest. In the first case, you will get spicy piquant candied fruits, in the second - with a pronounced citrus aroma.
It will take 3 days to prepare the dish at home.
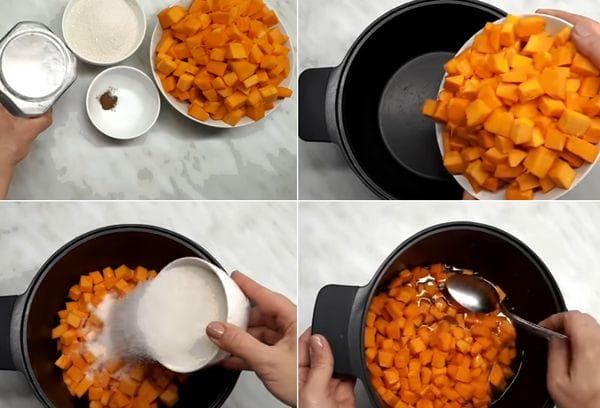
- Cut the pumpkin into 1x1 cm cubes and place in a saucepan.
- Add sugar and leave for 10-12 hours. It is more convenient to prepare the preparation in the evening so that you can continue working in the morning.
- When the pulp has released enough juice and the sugar has dissolved, add spices and citric acid to the pan.
- Place the mixture on the fire and cook for 2-3 minutes until the pumpkin is soft. Don't overdo it: you want neat cubes, not pumpkin jam.
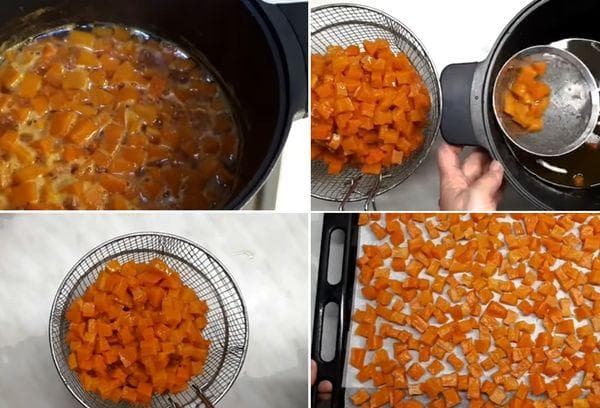
- Once the pulp has reached the desired state, turn off the heat and strain the mixture. Drain the pulp into a sieve or colander and place in a separate container.
- Boil the remaining syrup over high heat for 5-7 minutes.
- Pour the hot syrup over the pumpkin cubes and leave to cool.
- Place the pumpkin in a colander again and repeat steps 6-7.
- Leave the pulp in a colander for 1-2 hours until the liquid drains completely.
- Preheat oven to 100 OWITH.
- Cover a baking sheet with baking parchment and place the candied fruits on it in one layer so that the cubes do not stick together.
- Place the pan in the oven and dry for 3-4 hours with the door ajar. Processing time depends on the size and moisture content of the pumpkin cubes.
The candied fruits should shrink in size and harden. The consistency will be thick and chewy, like dried toffee. But don’t let the candied fruits become plastic hard; the candies should remain a little sticky.
Another characteristic sign of readiness is that the workpiece will become translucent.
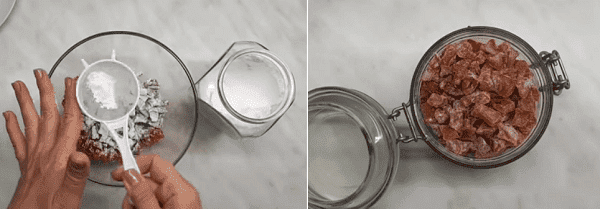
Transfer the dried candied fruits onto clean parchment and leave to “simmer” for a day at room temperature. When the candies are ready, mix powdered sugar with starch and roll the treat in it. Separate all the sticky pieces so that the mixture evenly covers each candied fruit.
Store natural sweets in screw-on jars or containers.
Canned pumpkin
Pumpkin is a close relative of zucchini, which means you can pickle it or ferment it.
Salted pumpkin
All you need: peeled pumpkin pulp, water and salt.
- Sterilize jars and lids.
- Cut the pumpkin into 1 by 1 cm pieces and place in prepared containers.
- Prepare a 15 percent saline solution. To do this, add 15 g of salt to 85 g of boiling water. Change the amount of brine depending on the volume of the jars, but maintain the specified proportions.
- Pour boiling brine over the pumpkin and roll up immediately.
- Cool the jars under a blanket.
This preparation is used as a semi-finished product for preparing first and second courses. You can serve salted pumpkin as a side dish, but try the canned version first. If the dish is too salty, soak it in clean cold water for 3-4 hours.
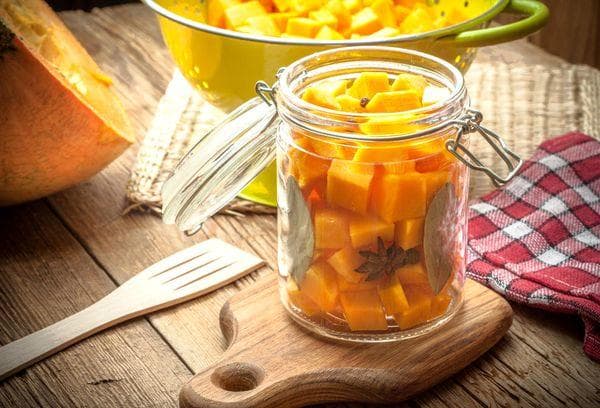
Adyghe style pickled pumpkin
Also a very simple recipe with a minimum of ingredients.You will need pumpkin, salt, water and spices: black peppercorns, red hot pepper and bay leaf. If desired, you can add any spices to taste: cardamom, thyme, basil, garlic, parsley, coriander, mustard seeds.
- Cut the pumpkin pulp into pieces and blanch for 1-2 minutes, no more. The pulp should be elastic.
- Drain the water in which the pumpkin was boiled and add salt to it. For 1 liter of water you need 2 tbsp. l. salt.
- Boil the brine, add spices and turn off the heat. Cool to room temperature.
- Place the pieces of pulp in jars and fill with cool brine.
- Cover the necks of the jars with fabric “lids”. Fold several layers of gauze or clean canvas, cover the containers and tie with twine. You can use plastic lids, but you need to punch holes in them for air circulation.
- Leave the preparation in the room for 3-4 days to allow the fermentation process to begin. Then put it in the cellar or in the refrigerator on the warmest shelf. In two weeks, the fermentation process will be completed, and you will receive a delicious and very healthy product.
Serve pickled pumpkin with herbs and vegetable oil. To make the dish more appetizing, sprinkle it with roasted pumpkin seeds.