Cleaning the siphon under the sink with female hands
Cleaning the siphon under the sink is one of the most joyless tasks for a woman. You can, of course, call a plumber and entrust this work to him, but sometimes you have to overcome such difficulties yourself. And not just overcome, but so that the process causes a minimum of inconvenience. Since I had to clear out clogs in the sink more than once, now I can summarize my experience and share it with everyone.
Why clean the siphon?
Many people believe (and I thought so too) that the curved pipe under the sink exists to make life difficult for people. If it weren’t for her, there wouldn’t be a lot of problems associated with a clogged sink.
In fact, the siphon has two functions:
- Firstly, this is a water seal. It acts as a barrier between the central sewer system and the kitchen, preventing unpleasant odors from leaking into the room. It works like this: after using the sink, part of the water goes through the pipes, and part remains in the siphon cup, forming a kind of plug. Over time (for example, when residents are away for a long time), this water evaporates - and after returning, the apartment owners may notice a stench coming from the sink.
- Secondly, it is a garbage catcher. If there were no siphon under the sink, all large objects that accidentally fell into the drain hole or were thrown there on purpose would pass further and form a blockage no longer in an easily accessible place, but somewhere where it is impossible to reach without a specialized tool and significant financial costs. . This would make both the use and maintenance of sewer networks difficult.
Based on the above, it turns out that cleaning the siphon is necessary to maintain hygiene (if it contains not clean water, but rotting food debris, the sink will become a source of bad odor), as well as to maintain the functionality of the drainage system.

Popular ways to clear a clogged sink
As plumbers say, you need to clean the siphon regularly - at least once a month, and not when it no longer allows water to pass through. I agree with them on this, but laziness is laziness, so most often you have to take up the plunger after clear symptoms of a blockage appear. And not only for the plunger, because there are at least three ways to remove the garbage “plug” in the sink. All of them have been experienced by me personally, and I have something to say about each of them.
Chemistry
The first time I had to use a drain cleaner was in my distant youth. My parents went to visit friends, and I stayed at home as the hostess. For several days I reveled in freedom, eating up supplies from the refrigerator, and then I came to the conclusion that if I didn’t start cooking, starvation would be a more than real threat. It’s easy to guess what the end of my stay in the kitchen was - the drain in the sink became clogged with “escaped” pasta and rice, pieces of vegetables that remained on the grater, and other culinary waste.
There was nothing to do - there was nothing left before the parents arrived, so I had to run to the store for some life-saving remedy. According to the saleswoman, it was “Mole” - cheap, but no less effective. Looking far ahead, I will say that he did not save me from catching up and only recently did I understand why:
- Caustic powders and liquids are effective if fatty growth or deposits of mineral salts have formed in any part of the pipe. They can also handle organic matter (hair, wool). And the soil that is washed off from vegetables and settles in the siphon, or food particles, are not dissolved by means available to ordinary citizens. At least in the blink of an eye.
- The larger the blockage, the longer it takes the product to eliminate it. Sometimes it may take several days or even a week. During this entire period, the sink cannot be used for its intended purpose, which creates great inconvenience.
In general, “Mole” and similar inventions of the chemical industry are good only for preventing blockages.
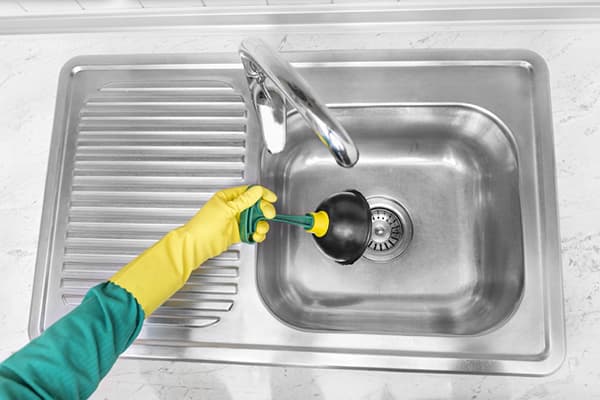
plunger
I'll say it right away: my fellow housewives underestimate the plunger. Perhaps because they don’t know how to use it, just as I once couldn’t. And my close acquaintance with him occurred during the times of independent living in a rented apartment. The drainage system there was arranged somehow strangely and incorrectly, which the owner of the property did not hide, so even on my first visit she stated that the tenant would have to regularly handle this item in order to avoid constant blockages. And that if I don’t agree with this state of affairs, then it’s better for me to find another option, because at the moment it’s not possible to completely replace the sink and pipes. Then it seemed like a small thing to me, and I agreed.
However, my efforts were of little use:
- Before trying to clean the siphon with air, you need to close the overflow hole (because this same air, following the path of least resistance, does not enter the siphon, but is discharged out). For this purpose it is convenient to use a piece of wet cotton cloth.
- Instead of air, which is easily compressed, it is much more effective to use water - cold is fine, but hot is better. True, all the garbage that comes out of the pipe will have to be immediately caught and thrown away, otherwise it will return to its original place.
- You need to apply force to the plunger not only when it is working for injection. Things will go faster if you sharply tear the suction cup away from the sink at the moment the air or water returns.
A professional plumber told me these secrets, and now I can deal with small blockages without any problems. The key word here is small. If the situation is stalemate, there remains a third - the most effective, but at the same time unpleasant - method of cleaning the siphon under the sink.
Disassembling the siphon
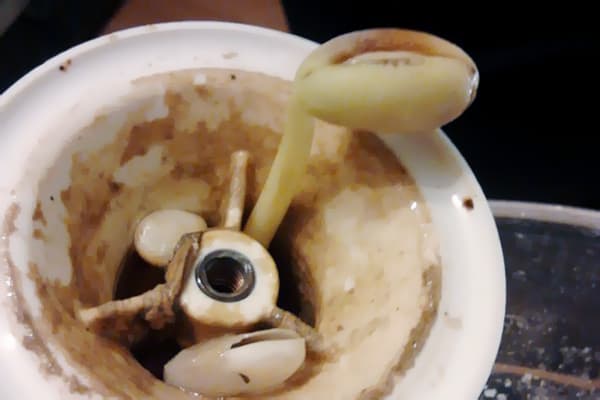
A garbage plug in a sink is formed according to the snowball principle - as soon as anything remains inside the siphon, everything else immediately begins to stick to it. The “glue” is fat, water in which pasta was cooked, and sweet drinks. A humid environment promotes rotting, so over time the clog turns black, and the smell emanating from it can be described in one word - stench. In this case, there is no choice but to disassemble the siphon.
Before starting such a responsible task, I collect from the list:
- disposable gloves (the cheapest way is to buy them at the pharmacy individually, without packaging);
- basin;
- several garbage or regular bags (you need to insert them into each other);
- hot water;
- sponge;
- detergent with degreasing and antibacterial effect.
Instead of the latter, I often use a mixture of “Whiteness” (3% bleach solution) and dishwashing liquid or laundry gel.
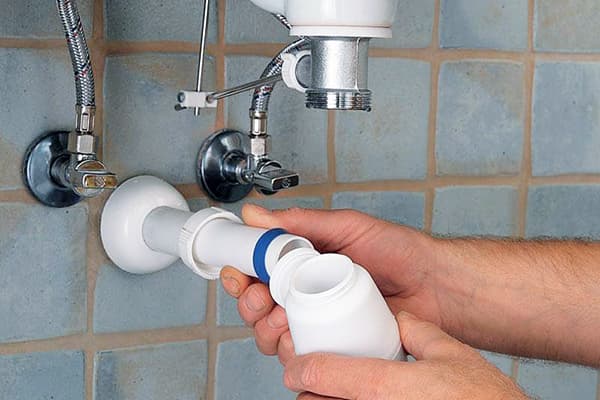
When I first unscrewed the couplings connecting the siphon to the rest of the drain system, only one thought was spinning in my head - at least not to break anything. But, as it turned out, breaking something is not so easy.
There are several types of siphons, although they are all designed according to the same principle - somewhere below or on the side there is a special reservoir, shaped like a cup or barrel. According to the rules, you only need to remove and wash it, but dirt accumulates everywhere, and personally I don’t see the point in cleaning out only 1/3 of the clog, allowing the rest to rot further. I also strongly advise you to follow my instructions:
- We put on gloves.
- Place a basin under the sink.
- Place the unfolded bags in the basin so that they line the bottom.
- We unscrew the very cup discussed above. A black slurry, similar to fuel oil, will immediately flow out of it (we try to work so that all the dirt gets into the bag, and not into a basin or onto the floor). We clean out the contents of the cup, which look like soaked cotton wool, with our fingers or unnecessary sushi chopsticks. Place the cup itself on the clean part of the bag.
- We unscrew the couplings that connect the drain pipe and overflow (if there is one) to the siphon. Lastly, remove the siphon itself by unscrewing the coupling located on top. It’s difficult to explain in words, but if you look at the design in person, it becomes clear what exactly needs to be twisted. We remove the blockage from the siphon in the same way as from the cup. By the way, under the couplings there are gaskets that look like transparent silicone rings.You cannot throw them away or lose them, otherwise the system will leak!
- We tie all the dirt into bags and throw it in the trash. We put the siphon, cup and other spare parts in a basin, fill it with hot water, add detergent and use a sponge to thoroughly clean it from any remaining dirt. Then we slide a basin under the sink and wash the pipe connectors.
- Let's put the structure back together.
- We place a basin under the siphon, so that if something happens, there is no flood in the kitchen, and open the tap. We look to see if drops or trickles of water appear at the fastening points. If not, then we rejoice and go to wash the basin from the remaining fat; if yes, then tighten the corresponding coupling more strongly.
Sometimes it happens that the leak does not disappear, even if you tighten the coupling all the way - in this case, you will have to go to a hardware store and buy a roll of foam (this is the name of the thread sealant). After returning home, you need to remove the coupling again, wrap the threads with foam and return the coupling to its place. The leak should stop.
The whole job takes about 10–15 minutes. But after its successful completion, you can be proud of yourself until next time and feel free to tear out the page with the plumber’s phone number from your notebook.
If you previously thought that cleaning the siphon under the sink was an incredibly difficult task, then I hope that I was able to dissuade you of this. And if you have your own secrets on how to get rid of clogs quickly and surely, be sure to share them with me and other readers!
Tamara Voskresenskaya