Simple decoupage of kitchen utensils, as my grandmother taught me - updating the ladle and metal tray
Even as a child, my grandmother taught me kitchen decoupage. Creating beauty with your own hands is great. And it’s not as difficult as many people think. I don't use special glues, napkins, or paints. I do everything the old fashioned way, on a budget. The main thing in this matter is not the expensive instrument, but the mood of the master. You need to take your time and do everything with your soul.
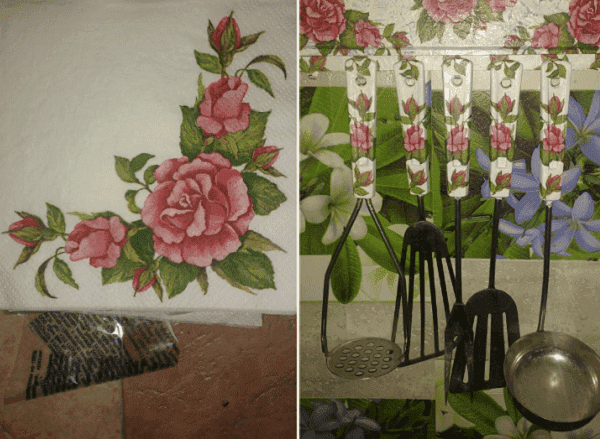
Decoupage of ladles
The first thing I wanted to talk about is the restoration of old Soviet cookware. They are made to last. The only problem is that they look too gray and unsightly. Well, that's easy to fix. I'll tell you how you can decorate the handles. We will need:
- white acrylic paint left over from the renovation;
- ordinary paper napkins with a beautiful pattern;
- PVA glue diluted with water 2 to 1;
- file or bag;
- soft brush;
- sponge (a piece of kitchen sponge);
- sandpaper.
We do decoupage in this order:
- Preparing the handles. All handles need to be thoroughly cleaned and rubbed with sandpaper to make the surface rough. Then degrease them with alcohol. This way the paint will adhere better. Cover the handles with a thin layer of white paint using a brush. When it dries a little, apply a second layer using a sponge. A white background is needed to make the drawing bright and beautiful.
- Working with a napkin. Before gluing the napkin, you need to carefully tear off the design (tear it off with your hands, and not cut it with scissors!). The napkin will begin to separate.Slowly tear off the bottom white layer. We don't need him. Iron the napkin with a steam iron on both sides. After this, you can separate another layer.
- Decoupage. Then everything is simple. You need to cover the file with diluted PVA, place the drawing face down, apply a little of the same glue on top, and attach the workpiece to the plastic handle. We smooth the drawing through a file so that it does not tear. Carefully remove it and dry the surface with a hairdryer. If bubbles appear, press them with your finger.
- Finish. When our decoupage is completely dry, you will need to coat the surface with varnish. I apply it in 3 layers. The drawing holds up perfectly. I use the ladle almost every day.
Decoupage an old metal tray
I got this old tray from a neighbor. She was going to throw it away: it was rusty in some places and covered in scratches. In general, there is no view. I gladly took it. Metal products can also be decorated with decoupage. The simplest enamel is suitable for primer. To make it dry faster, you can blow with a hairdryer. But I used acrylic that I had.

Materials:
- the same as for decoupage of ladle;
- plus acetone (nail polish remover);
- colored acrylic paint to add color.

Decoupage of metal products is performed as follows:
- Surface cleaning. You need to work well with a brush and wash the product with detergent.
- Degreasing. To ensure that the paint adheres well to a metal surface, I use acetone.
- Primer. If there is rust, you need to apply a thicker layer of paint. When it dries, we remove the roughness with sandpaper. Apply a second layer with a sponge. It makes the coating smoother.
- Painting in color. The color of the paint should match the pattern on the napkin.It is also better to apply it with a sponge or soft brush.
- Separating the design from the napkin. As I already said, the design is torn off along the contour, and then the napkin is taken apart into layers. To prevent the top layer from accidentally tearing, you can spray the napkin with varnish and dry it. The thinner the paper with the pattern, the more accurate the decoupage will be.
- Drawing. Spread PVA glue with water (2:1) on the file, place the design face down on the glue. Using a soft brush, apply the adhesive mixture on top of the paper. Transfer to a tray. Smooth it out. We remove the file. Let's dry it.
- Varnishing. The varnish can be applied in 5 or 6 layers. But each layer must be thin and dry before applying the next. I varnish myself in 3 layers. As practice has shown, this is enough.
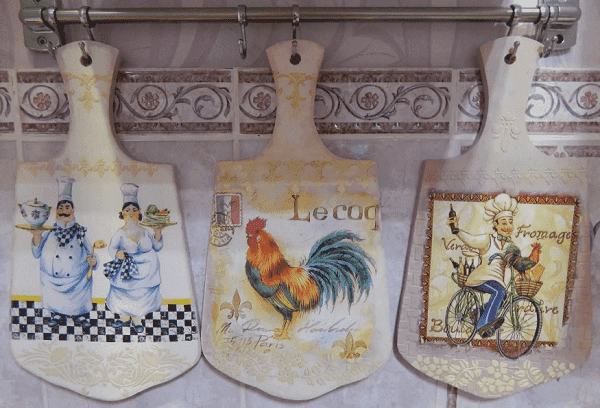
Decoupage is a wonderful technique that anyone can master. My grandmother taught me when I was still 12 years old. We restored old teapots with cracked enamel and tin jars. The results were very beautiful flower pots. And using the decoupage technique, I updated old cutting boards, a bedside table, a floor lamp... I can’t remember everything. I hope my experience will be useful to someone.