I was not afraid and repainted the refrigerator in the color of the kitchen, my parents are delighted
Content:
When I announced that I was going to paint the refrigerator at home, my mother-in-law twisted it at her temple. “It’ll peel off.” But no. After painting the kitchen facade was successful, I began to take things easier. Why not repaint an old thing if the previous color has become boring or has gone out of fashion? Now don’t wait until the refrigerator breaks down to buy a beautiful and modern one. You only live once.
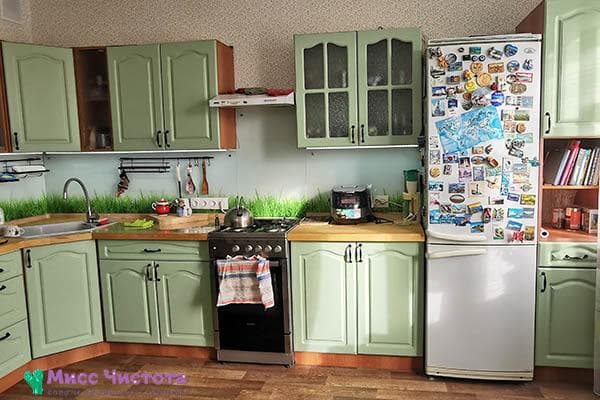
Updated kitchen with old refrigerator
Is it possible to paint a refrigerator?
The older generation never wondered whether refrigerators were painted. Previously, all refrigerators were white and nothing else. The marketing ploy worked for a long time. People thought that everything snow-white was clean and sterile. And, of course, no one thought of painting white as white.
The soul of a modern person is drawn to the beautiful and unusual. The interiors reflect the inner world of the owners, harmonizing in colors, shapes, and style. I also wanted to make the kitchen a little more harmonious. The snow-white old man was too dissonant with the new noble pistachio color of the headset.
Before getting down to business, I inquired about the technology of painting refrigerators and the reviews of those who had already decided to take such a step.
Information on this matter is contradictory.
Most “specialists” claim that repainting a refrigerator can only be done in a car workshop using special aerosols. You can't paint houses with them - they stink very much and can stain the entire kitchen. If you use regular paints, the surface will bubble and peel. But there were also encouraging reviews. I believed in them, and I was not mistaken.
It is better to divide the work into several stages
How to paint a refrigerator with your own hands
I found the process of repainting the refrigerator quick and simple. Active actions took 2-3 hours, no more. I divided all the work into 5 stages:
- Surface cleaning.
- Sanding and degreasing.
- Protection of seals and handles.
- Applying primer.
- Applying paint.
You can do them more than one day.
The main thing is to take your work responsibly.
The surface must be thoroughly washed, the gloss removed and coated with a primer. All these manipulations help the paint adhere better to the metal. Even though I’m not an expert, the paint sticks to my refrigerator like it’s original.
We prepare materials and tools
It is better to plan painting the refrigerator on a weekend. It doesn’t take long to paint it yourself, but you’ll have to wait for more than one hour for the layers to dry. I started in the morning and completed the event completely by evening. During the waiting periods, you can do household chores or just relax.
Now about the tools. To paint the refrigerator I used:
- universal short-haired (velor) roller;
- painting tray;
- narrow brush;
- artistic brush;
- masking tape;
- fine grain sandpaper;
- detergent, soda;
- rags, rags, newspapers;
- old toothbrush, spatula.
List of materials:
- primer for metal – 300 ml;
- acrylic paint – 1 liter (a little paint left).
I bought the brush and roller at Leroy Marlene. I especially want to praise the roller. Proved to be a 5+ in his work: he rolled out the paint perfectly smoothly and did not splatter.
What paint to paint the refrigerator
It is better to contact a paint store consultant with this question. Ask what can be used to paint the outside of the refrigerator, and you will be offered different options. Both enamel and acrylic paint are suitable. The main thing is that the film adheres tightly to the metal, is resistant to abrasion and is suitable for wet cleaning.
I was faced with a choice:
- alkyd thixotropic enamel;
- acrylic latex paint;
- acrylic water.
I chose LITTLE GREENE Intelligent Satinwood water-based acrylic paint.
The advantage of water-based paints is that they do not have a strong odor and dry relatively quickly. Specifically, my paint did not yet require a topcoat. There was no need to use varnish.
Advice. It is better to choose a matte finish for the refrigerator. Fingerprints remain on the gloss, and the slightest scratches and dirt are noticeable.
First stage: surface cleaning
First, you need to wash the refrigerator thoroughly. I only washed it on the outside. Therefore, the process did not take much time:
- I took off the magnets.
- I diluted a few drops of dishwashing detergent in warm water. I wet the cloth and walked over the entire surface.
- Upon closer inspection, it turned out that in some places there were dried spots and a yellow coating.
- Dried stains were removed with a spatula and an old toothbrush.
- Rubbed greasy stains with baking soda.
- I wiped the surface several times with a clean, damp cloth and left the refrigerator to dry.
Second stage: de-glossing and degreasing
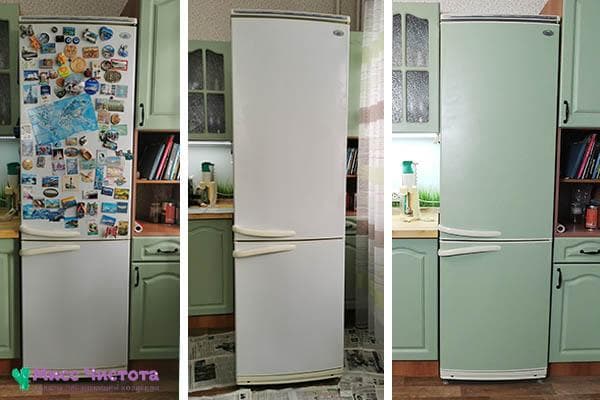
At this stage, I advise you to take a photo of the refrigerator in order to compare later - how it was and how it is now. It's time to get down to business:
- I armed myself with fine-grit sandpaper and began to rub the refrigerator section by section. As a result, the gloss should disappear from the surface, and roughness should be felt when holding your hand.
- I wouldn’t say it takes a long time to sand the refrigerator by hand, but your hand gets tired. Therefore, if you have a grinder or drill with a fine-grained abrasive disc, it is better to use them.
- We wipe the refrigerator from dust and degrease it. I still had technical alcohol. But you can also use regular vodka. I don't recommend solvents. Their smell is too strong. You may get a headache, and there are still 3 important processes ahead.
Accuracy is important in repainting
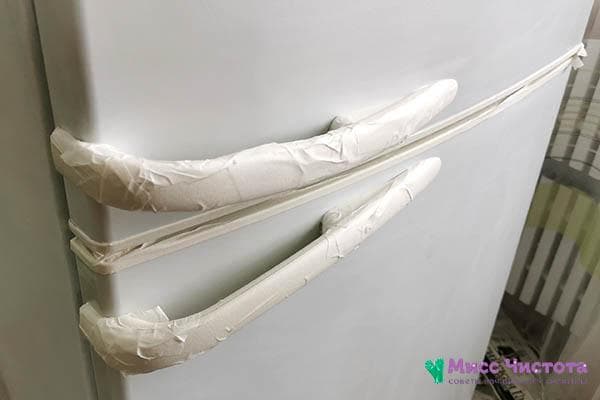
Third stage: protection of elastic bands, handles and floor
I decided for myself that I would not disassemble the refrigerator. Moreover, I didn’t even turn it off and didn’t take out the food. This created some inconvenience at work. The sensor beeped all the time, which really got on my nerves. In some places I had to use an artist's brush.
If you want to repaint your refrigerator with ease, I advise you to disconnect it from the power supply, take out all the contents and unscrew the handles.
I'll describe what I did:
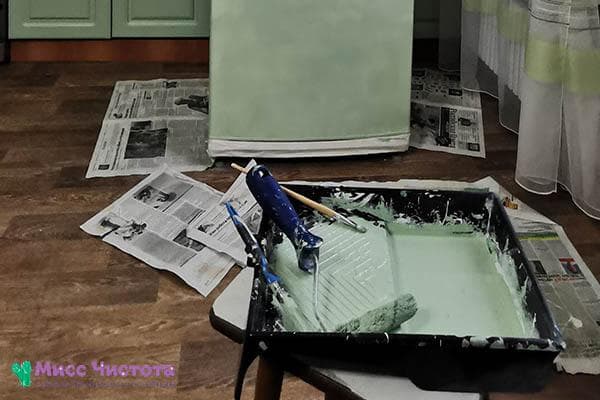
- She pulled out the refrigerator onto the newspapers spread on the floor. If there are no newspapers, you can cover the floor with bags, cling film or large oilcloth.
- I covered the handles, door seals and the inner surface around the edges with masking tape. You need to cover everything that you are not going to paint.
Stage four: primer
The surface of the refrigerator is considered complex. Therefore, you can’t do without a primer. I used the same brand of primer as the paint. Products from the same manufacturer are perfectly compatible. They are manufactured using the same technology and undergo different tests. At least this applies to companies that value their reputation.
How I primed the refrigerator:
- I poured some primer into the paint tray.
- Rolled it out with a universal roller.
- Apply a thin layer to the surface of the refrigerator.
- I primed hard-to-reach areas using a small soft brush.
- Left it until completely dry.
- The primer dried in about 2 hours.
- After that, I lightly rubbed the primed surface with sandpaper.
- I wiped away the resulting dust with a damp cloth.
Advice. Wash the brush, roller and tray immediately after priming. It will still be needed for painting. If the primer on an instrument dries, it will be more difficult to clean. I wiped off the remaining primer with a rag and then rinsed everything in hot water.
First coat of paint applied to refrigerator
Fifth stage: painting
The final stage is the most exciting. And the most pleasant. A little more, and the refrigerator will appear before us in a new look.
You need to paint your refrigerator quickly. Otherwise, the layers will overlap each other, forming sagging and spots.
Paint the refrigerator in the following color:
- Fill the tray with paint.
- Roll it out well with a roller, first in the tray, and then on the surface of the refrigerator.
- We begin to paint the refrigerator from top to bottom. This way you can avoid drips. But in general the paint should not flow.
- Be sure to apply the paint in a thin layer. It's okay if she stripes. The second layer will then cover everything.
- We paint one side with a roller, and then touch up hard-to-reach places with brushes.
- We paint all sides sequentially.
- Just in case, keep a damp cloth nearby. It can quickly remove accidental drops of paint.
- After the entire surface of the refrigerator is painted, leave it to dry. I waited for about 2 hours.
- The second coat of paint is applied in exactly the same way as the first. In my case, two layers were enough to ensure an even color of the refrigerator.
- If the paint is still streaking, you can apply a third coat. The main condition is that the previous layers must dry well.
- We wait for the paint to dry completely and remove the masking tape.
Advice. The best time for painting work is 9-12 noon. The sunlight is bright, but not blinding. All flaws and the demarcation line between the painted and unpainted area are clearly visible.
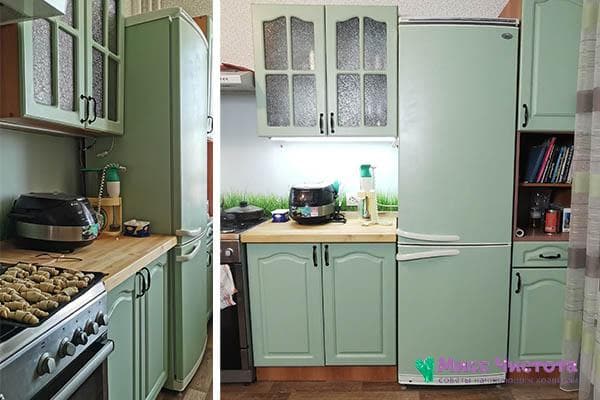
Refrigerator in the same color with facades
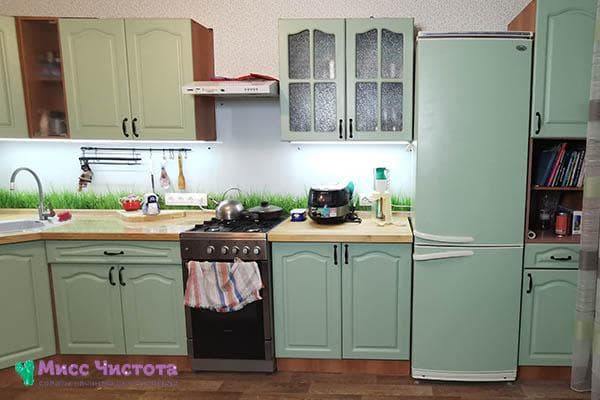
Wait until the paint is completely dry, then use the item
2 hours passed and the refrigerator became quite nice and dry to the touch. But don’t delude yourself on this score. If you rub the surface with force or try to scratch it, marks will remain and the coating will be damaged. It takes 2-3 weeks for the paint to completely stabilize. During this period, it is better not to touch the painted surface. You only need to grab the handles. If possible, you can temporarily not use the refrigerator. Then the renewed beauty will remain in good condition for a very long time!

If you want to repaint your refrigerator in one day, plan enough time
Thanks to everyone who read to the end. I was glad to share my experience. If you have any questions, feel free to ask.
You are just fire!! I'm working up the courage to repaint the walls in my apartment. By the way, in one of the rooms I wanted to make it exactly the same color as you chose for the bathroom (what color is this, tell me??). I didn’t even imagine that you could paint over tiles beautifully. Would I repaint the tile backsplash in my kitchen?