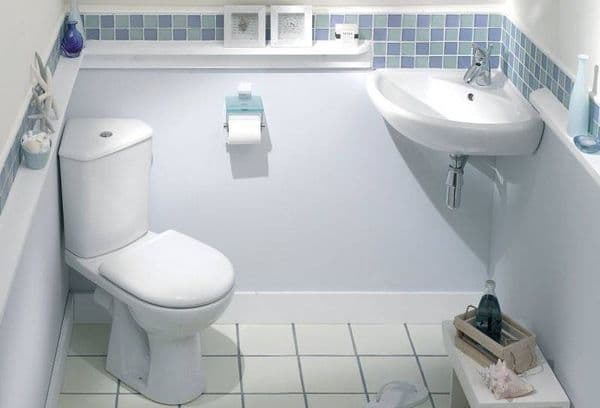
How to disassemble a toilet cistern with a button
Modern water overflow mechanisms for the toilet cistern are designed in such a way that they are quite easy to remove and, in addition, they do not require repair or replacement. Most often, to eliminate a leak, it is enough to adjust the length of the rod with the seal at the end so that the plug fits more tightly into the hole. To get the mechanism, you need to disassemble the toilet flush cistern. If it is an outdoor model with a button, you will need to remove the cover. The installation is a little more difficult to work with: only the buttons on the wall are removed, and the mechanism will have to be removed through the narrow hole that opens.
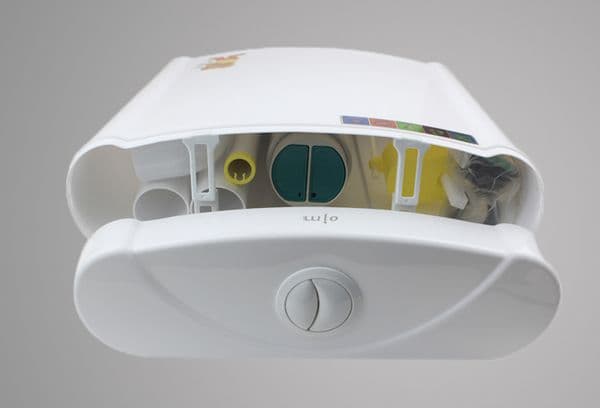
How to disassemble a tank with a button
The specific method depends on the brand and model.
Threaded one-piece fastening (for example, tanks from AlkaPLAST):
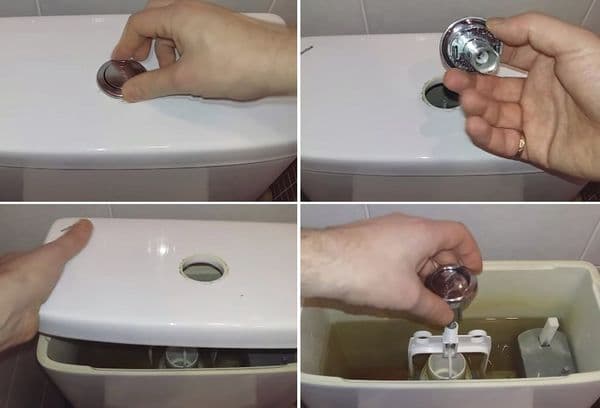
- Slightly recess the button and pinch the framing ring-sleeve with your fingers.
- Unscrew (counterclockwise).
- Remove the cover.
- The drain mechanism is mounted on pins: you need to turn the pipe with the rod counterclockwise so that the pins come out of the grooves, and remove the entire mechanism.
The same mount for brands Santek, Roca, Sanita, Cersanit, Jika.
A similar device is when you first need to unscrew the ring-bushing, and then the button, which is screwed into the movable bar (this makes the mechanism more universal and allows the button to fit exactly in the center of any tank lid).
Push-button mechanism with stoppers (example: Ifo):
- Tilt the button to the side, pry it with your fingers or a plastic knife and remove it.
- There is a fastening screw under the button; you need to unscrew it and put it aside.
- Using needle nose pliers, pliers or your hands, release the stoppers that hold the frame for the button on the sides.
- Remove the frame and loosely remove the earthenware cover.
Key release (using the example of a tank Gustavsberg):
- Slightly press the key away from you.
- A small groove will appear at the near end of the key - grab it with a screwdriver or a plastic knife and pull it up until it clicks.
- Under the key there is a screw that actually holds the structure together. It can be easily unscrewed by hand, but due to the narrow framing frame it is more convenient to use narrow-nose pliers.
- Remove the plastic frame, which also doubles as the lid.
Important
Before disassembling any barrel, be sure to turn off the water, otherwise the constantly accumulating water will interfere with work.
Installation
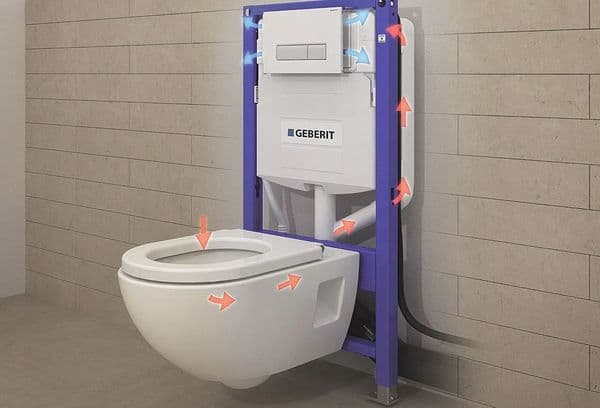
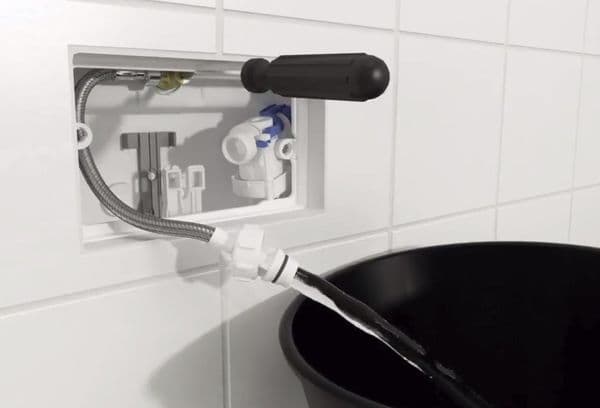
The most difficult thing is to remove the mechanism from the built-in tank. The main problem is limited space. Access to the rod, tubes and supply hoses is provided through a narrow opening under the frame.
The strip for buttons itself can be folding (after dismantling the facade plug, the strip opens like a book, and the buttons do not need to be removed from their fastenings) and single (having removed the casing, you will have to remove the buttons). In some models, the bar with buttons is attached with screws to the mounting frame, in others (cheaper) it is fixed directly into the wall.
Important
If the installation has a dual flush, each of the buttons is connected to its own pusher rod (unlike most external tanks), and each of them needs to be disconnected.
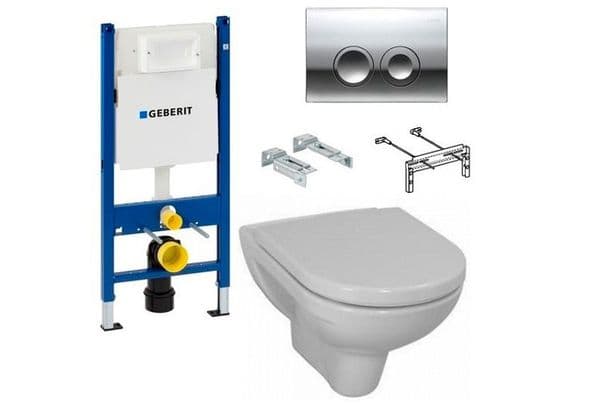
Step-by-step instructions (using example Geberit Delta):
- Lift and remove the trim with buttons.
- Unscrew the screws on the sides and the pushers in the center.
- Remove the frame.
- Release the fasteners and remove the damper.
- Remove the block with two rocker arms (transmitting movement from the pushers to the rods with plugs).
- Remove the filling valve (it is not necessary to remove it from the hoses - just take it outside).
- Remove the release valve clamp (to do this, release the “whiskers”).
- Remove drain valves. U Geberit Delta their device is designed to work in narrow spaces. First you need to turn and remove the upper end of the left valve. Then bend the right flap (press sideways until it clicks). In this form, the structure is quite easily lifted and then passes into the hole in the wall.
Repair of an overflow mechanism using an example Grohe:
- Having released the latches, remove the front panel with buttons.
- Unscrew the nut and disconnect the water supply hose.
- Pull up, turning so that the tenons come out of the grooves, and pull through the window.
The drain valve can be removed just as easily: you need to pull it up until it clicks, and then remove it through the hole in the wall.
Most common faults
The most common complaint after using a toilet tank for several years is that water constantly flows into the toilet. This means excessive consumption of cold water, rust on earthenware and increased wear of the drain and overflow mechanisms.
Most often the problem is caused by:
- accumulation of salts and water scale, due to which the gasket fits less tightly - just clean it using special or improvised means;
- accumulation of dirt and rust from the pipes, which lead to depressurization, and in addition, they clog the holes in the toilet and its outlet pipe, as a result, the plumbing works worse and worse, more and more water is required to flush away waste - if the water is very dirty, it is very important to regularly clean the tank and soften it with special salt, products such as Calgon. A heavily rusted tank will have to be soaked and left overnight and the procedure repeated several times.In this case, the product must be tolerant and safe for plastic and rubber;
- deformation, rupture or hardening of the cork - experts advise soaking it in a soda solution, but most often the gasket has to be replaced. If the cork has become a little stiffer, it is enough to adjust the rod so that they drop lower, press the cork harder, and it fits tighter.
For information
Half an hour to an hour after flushing the water, the back wall of the toilet should be dry. If it is wet, the plug is leaking, and you need to either adjust, clean, or repair the mechanism.
Installations rarely have problems such as incorrect position of buttons. If the button moves out of place and is even slightly pressed by the trim, it will constantly put pressure on the pusher rod, and water will leak a little.
Finally, in addition to salts and dirt, there may be an accumulation of mucus. Ideally, this should not happen, because the water is constantly renewed in the tank, and these are not suitable conditions for bacteria. However, this also happens. Fortunately, such plaque can be removed very simply: with warm water and a sponge or brush. After cleaning, it doesn’t hurt to disinfect the container and mechanism, for example, by throwing in 1 tbsp. l. citric acid.
The magazine purity-en.htgetrid.com recommends using salt to soften water, or once a month (with average water hardness) wash the tank by pouring a warm solution with a plumbing cleaner, Persalt, soda ash, Calgon, Finish or etc.
Don’t forget to clean the tank from time to time and check the toilet wall to make sure it is dry. This will help you avoid having to disassemble the drain tank for a long time and not worry about the serviceability of the mechanisms and hoses. If dirt has accumulated, remove the plastic parts and wash them, then put the tank back together.Most likely, the problem will be resolved.