4 stages of cleaning construction dust and ways to minimize pollution
The walls are wallpapered, the ceiling is painted, laminate flooring is installed, and it seems that you can already breathe a sigh of relief and start celebrating the completion of the renovation, but the smile quickly disappears from your face when you realize that the tedious cleaning of construction dust lies ahead. It seems that you won’t be able to deal with this scourge on your own faster than in a few weeks, but we know how you can clean your apartment of dust after renovation without resorting to the help of professional cleaning companies.
About the importance of preventive measures
You need to think about cleaning the room after renovation before it begins. Imagine in vivid colors how hard and how much time you will have to scrub your apartment: this image will help you understand that it is better to take care of the cleanliness of things in advance, taking measures to save them from the fine, ubiquitous dust.
- Remove everything from the room that can be removed: from indoor flowers and curtains to furniture, if it can be removed without much difficulty. Collect small items in boxes or bags and also take them out of the room. The fewer items left in the room, the fewer things you will have to dust off.
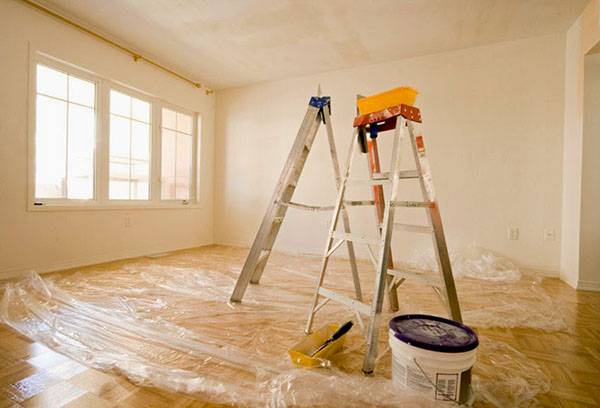
- If you cannot remove the item and it does not interfere with the repair, you need to protect it from construction dust, which instantly eats into the upholstered furniture and is simply attracted to the equipment.The best solution for this is construction protective polyethylene film, which completely covers the product, securing it with tape so that dust certainly has no chance of reaching the object.
- We also recommend covering the floor with film, especially if it has already been completely renovated. Although, if you are going to lay the floor during or after processing the walls, then the film will not interfere with the rough floor screed: to remove debris, it will be enough to remove it and throw it away along with the construction waste.
- It is also worth protecting the window from dirt: particles of construction dust can be hard, which means that micro-scratches will probably appear on the window when you vigorously scrub away the dust that has settled on it. In this case, the window is closed along with the window sill and slopes: if the plastic is a little rough, then it will be very difficult to wash off the dust that has settled into the recesses, plus do not forget about the risk of the same scratches.
- Even if you are renovating only one room, rest assured: without certain protective measures, dust will spread throughout the house, penetrating even the most secluded corners. How to avoid this? It is enough to curtain the doors leading to the room being repaired and other rooms with a damp thick cloth or polyethylene so that the cloth covers the cracks in the doorway.
Advice
Stock up on a respirator during renovations: construction dust isn't as safe as household dust, and you don't want it settling in your lungs.
Where to start and how to finish cleaning?
If you think that we will tell you how to remove construction dust in a couple of minutes without much effort, then you will be disappointed: in any case, cleaning will take more time and effort than usual. But you don’t need any complicated manipulations to wash off the dust.True, only if you did not ignore the first section of the article and protected the floor, window, furniture with appliances and other small items as much as possible.
- Garbage collection
Before you start dealing with dust, you need to remove larger debris that remains after the renovation. Some of this can be done by hand, but if you need to sweep away small pieces of wallpaper or plaster, be sure to dampen the debris first, otherwise the dust will rise into the air and you will have to wait for it to settle before starting the second step.
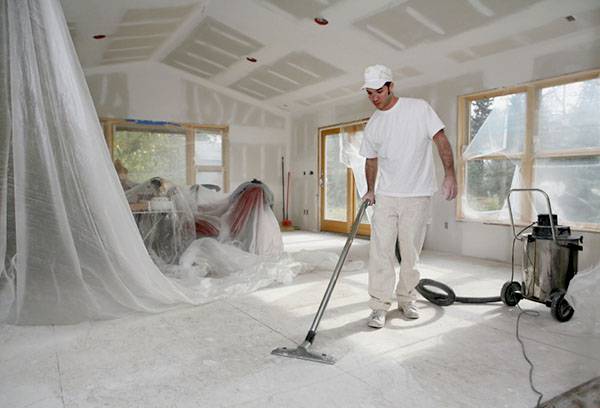
- Dry cleaning
When the dust has settled, the room needs to be thoroughly vacuumed, but to prevent the dust from scattering while you walk with a vacuum cleaner from corner to corner, we again advise you to slightly humidify the air in the room. A broom is not very effective in this matter, even with a wet floor: it is better to use a powerful vacuum cleaner with a paper or plastic collector. It is better to vacuum in 2 stages: before you remove the plastic protection from things, and again a couple of hours after.
- Wet cleaning
Wait a few hours before wet cleaning so that the dust from the air settles again, and wet clean the room. There is no need to torture vacuum cleaners and electric mops: a large amount of construction dust can ruin them. Use regular rags that you don’t mind throwing away, because a fresh, clean rag is the only effective way to deal with white stains. Before final cleaning, you will have to change about five such rags for the floor and 1-2 to wash furniture where dust has settled that could not be removed in the previous stages.
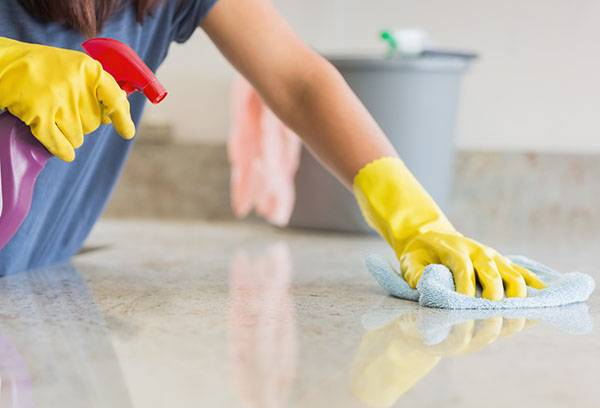
- Cleaning
Now all that remains is to clean the apartment as you are used to. Wash the floors with a special product, wipe off any remaining dust that has settled on things.The gradual settling of dust residues is an absolutely normal phenomenon, so in the first weeks after general cleaning, be prepared to wash the floors and wipe horizontal surfaces a little more often than usual.
In general, you can complete the cleaning even with pauses for the dust to settle in one day, which is pretty good. The main thing is not to forget that this is largely due to preventive measures, and to take care of protecting things in a timely manner.
Clean where there is no litter...
To your fair remark that it is simply impossible not to litter during renovations, we will answer that it is quite possible not to let the situation get worse and keep many things clean. To do this, all contamination must be removed in a timely manner, and not wait until mountains of construction waste accumulate. Then, when the renovation is complete, you can get away with a relatively easy cleanup, rather than spending days throwing away, scrubbing, and laundering what might have been thrown away, scrubbing, and laundering during the renovation work.
- The primer from windows, floors and other finished surfaces must be wiped off immediately, otherwise after drying it will no longer be possible to wash it and you will have to use a knife or spatula with the risk of ruining the surface.
- Stains from polyurethane foam, oil paint or drying oil are removed immediately, since after drying they can only be washed with the help of special solvents.
- Construction debris should be removed daily, as well as light dusting. So after the renovation you will have to clean up quite a bit.
- Open the window as often as possible during repairs: dust in the air will partially leave the room.
- Use a spray bottle: so that the dust settles faster and does not spread throughout the room and apartment, wet the walls and ceiling before sanding, removing the old coating and drilling. You can also humidify the air after these manipulations in order to “nail” the dust to the protective film with which you covered the floor.
- During drilling, you can use special attachments - dust collectors - or a vacuum cleaner. This method is more suitable for small jobs like hanging shelves or securing a baguette, when fiddling with polyethylene is impractical.
Advice
Sometimes an air humidifier is used during repairs, if this does not contradict the requirements for the work being performed. This way, the dust quickly settles, you don’t need to run around the apartment with a spray bottle, and the air becomes safer without small particles of construction debris hanging in it.
Don’t be lazy to make high-quality preparations for renovation work, clean up during the process and apply our tips for minimizing the amount of construction dust, and then cleaning after renovation will not take you much time!