How to make a paper cube step by step: 7 methods, diagrams and layout
Content:
You can make a cube out of paper in different ways. If you need a regular small cube, the easiest way is to use a template with a scan pattern. It is printed on A4 sheet, cut out and glued. You can fold paper cubes using the origami technique and create unusual and original cubes, for example, magic or modular ones. We bring to your attention 7 options for making paper and cardboard cubes with diagrams and step-by-step instructions.
Required materials and tools
It is better to make a three-dimensional figure from thick paper or cardboard. Then it will turn out smoother and stronger. To work you will need a minimum of materials and tools:
- paper or cardboard (white or colored);
- stationery scissors;
- straight ruler;
- glue.
To quickly glue a paper cube, it is better to use a dry glue stick. PVA glue is more suitable for gluing cardboard.
What else may be useful at work:
- Materials for decoration. Educational cubes are covered with printed pictures of animals, continents, flowers, and the alphabet.Cubes for decoration can be decorated with decorative tape, wrapping paper, and adhesive rhinestones. A spectacular figure is obtained from glitter foamiran or felt.
- Template or diagram. When creating a complex 3D cube, it is advisable to keep the diagram in front of your eyes at all times, checking the order of actions and the result obtained. You can use the electronic version, but it is better to print it. The template with the cube scan is also printed or redrawn on a sheet of paper.
Cube development diagram
To make a small cube with sides up to 5 cm, one piece of A4 paper is enough. You need to print or draw the following scan diagram (layout):
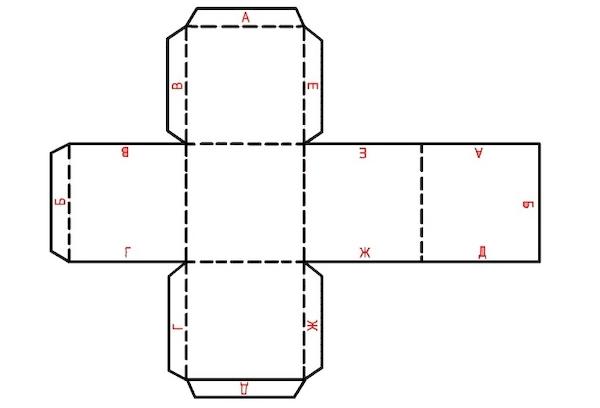
How to use the gluing template:
- Cut out the shape along the contour.
- Place a ruler on the dotted line.
- Fold the paper and press the folds well.
- Make folds along all dotted lines.
- Assemble the cube according to the markings: glue protrusion “A” to side “A”, “B” to “B”, etc.
How to make a large cube out of paper?
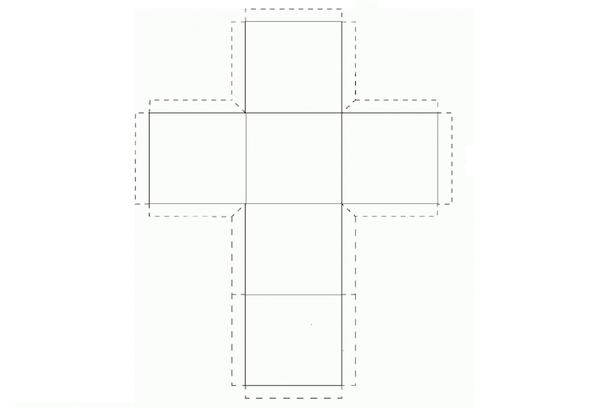
If you need to make a medium and large cube, you should take paper in A3, A2, A1 or even A0 format. It all depends on what size figure you need. From paper of the largest A0 format, you can make a cube with sides of 27.5 cm. You will have to draw the development diagram yourself. This is not difficult to do. Even a child can complete the drawing.
Necessary:
- Prepare materials: paper of the required size, a simple pencil, a long straight ruler, scissors and glue.
- Place a piece of paper in front of you vertically.
- Move 0.5-1 cm from the top of the sheet and draw a segment in the center corresponding to the side of the cube.
- Draw the same segments on the sides of the first segment perpendicularly downwards.
- Connect the side segments with a line at the bottom. You will get a square.
- Draw 3 more exactly the same squares under the first one (without indents).
- Draw a square to the left and right of the second square from the top. The result will be a figure resembling a cross.
- Now around it you need to draw an allowance of 0.5-1 cm with a dotted line.
The drawing is ready. The layout can be cut out, folded along the lines, and glued together.
Scheme:
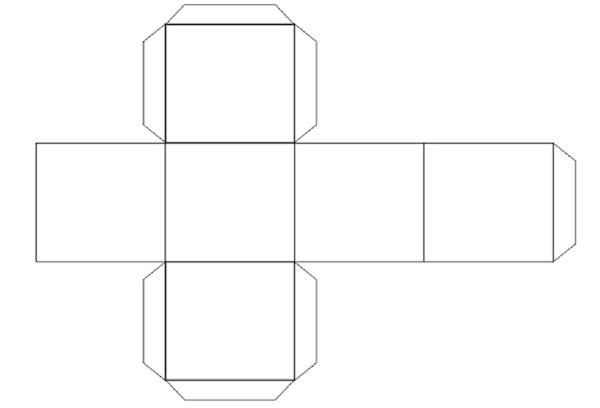
How to make a cube from cardboard?
A cardboard cube is made according to the same principle as a paper cube. You can use the same schemes and templates.
If the cardboard is very thick, it is better to cut it with a stationery knife and glue it with universal glue Titan, Moment or hot glue. In this case, the protrusions are hidden inside: glue is applied from the face and pressed to the wrong side of the cube. Then after gluing the figure turns out smooth, beautiful and even.
Large building blocks for children
Children's stores are overflowing with all kinds of toys: electronic, soft, educational. The assortment is so huge that it makes your eyes wide open. But often they do not contain the most basic thing - ordinary building cubes. This is a kind of construction set that the youngest children, up to 1 year old, can play with. According to child psychologists, teachers and pediatricians, they are best suited for the development of children. A simple and understandable form, the absence of exciting sounds and flashing lights have a positive effect on the child’s psyche and give room for imagination.
Parents can make their own block toys. To do this, you will need cardboard boxes or cardboard 2 mm thick and half an hour of free time. How to quickly and easily assemble a large cube from cardboard for the game:
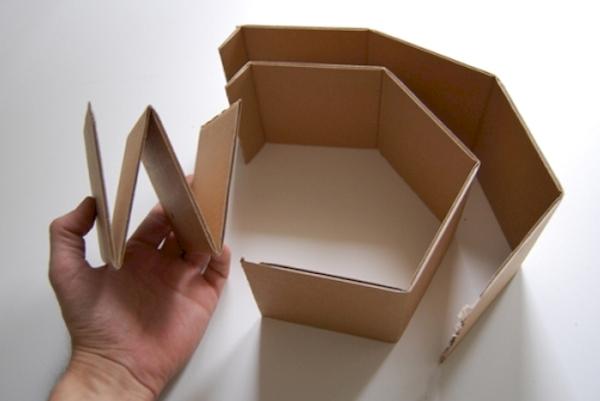
- For each cube, cut out 3 strips of cardboard in the following sizes: 10 by 40 cm, 10 by 43 cm, and 10.4 by 44.6 cm.

- Using a ruler, make folds on the strips (edges).The first part needs to be bent 4 times every 10 cm. The second part is bent in the same way, plus a 3 cm protrusion for gluing. On the third strip, folds are placed every 10.4 cm. 3 cm are left for gluing the part.

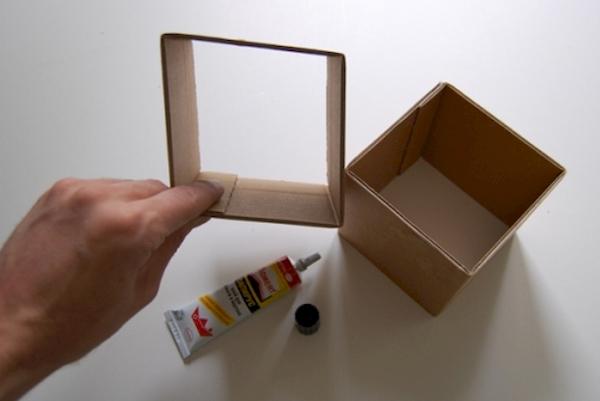
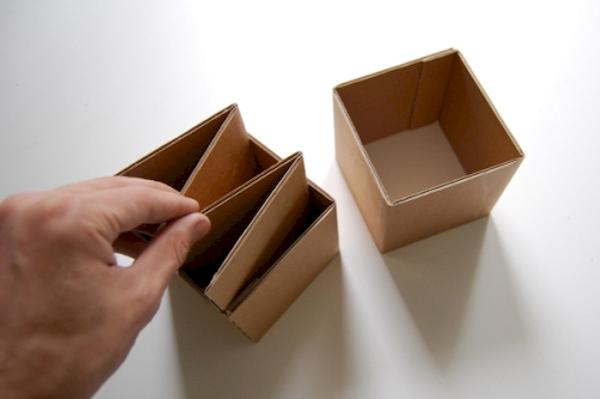
- Now assembly. The second and third parts need to be glued in the same way: roll them up, apply glue to the protrusion and press it to the inside. The first part should be inserted folded into the second part. The third part covers the second and first. Photo:


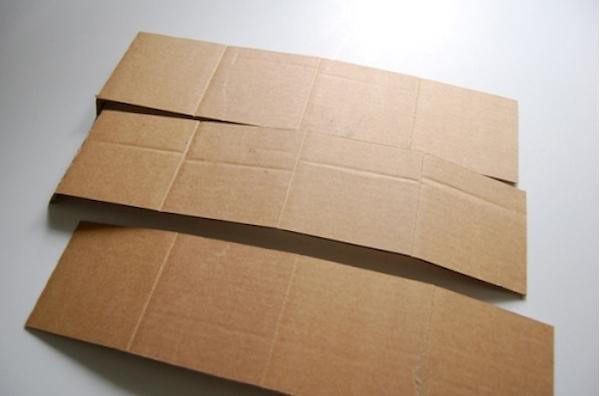
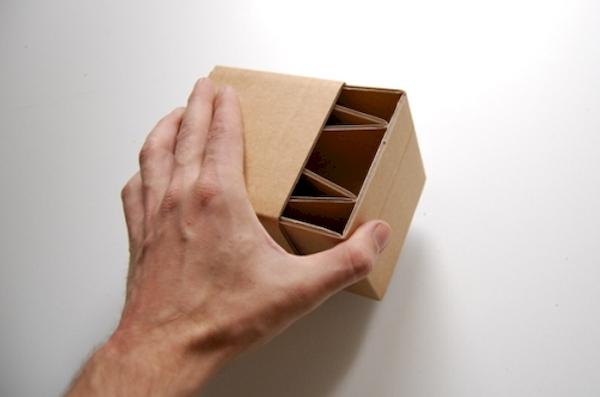
The result is a good-quality cardboard cube that does not wrinkle during play.

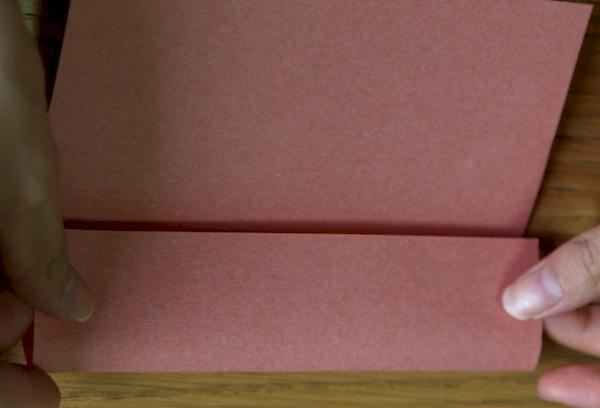
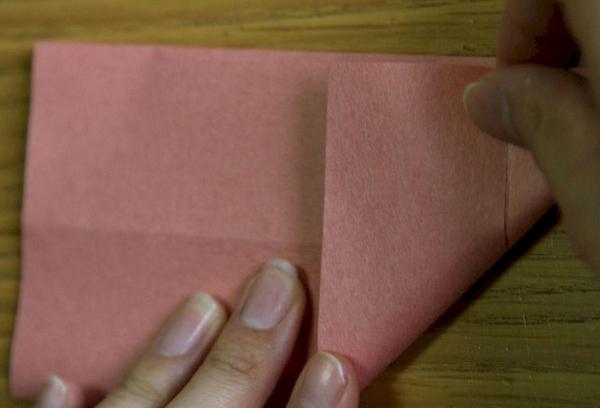
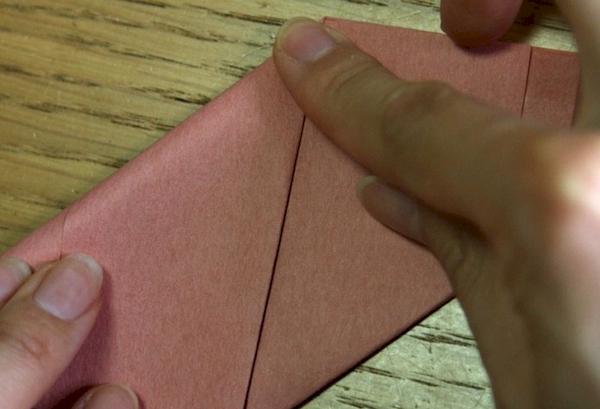
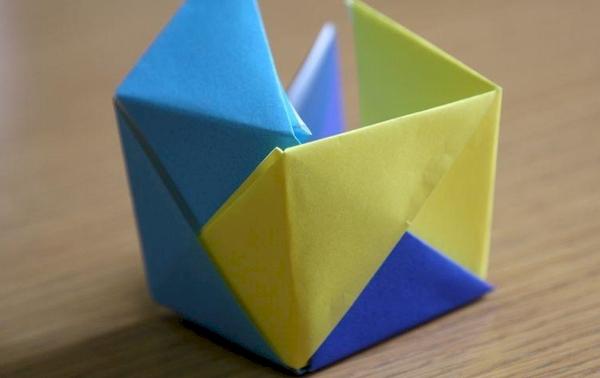
Using origami technique
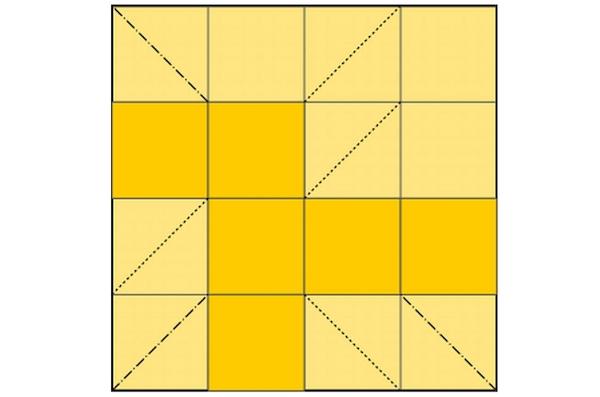
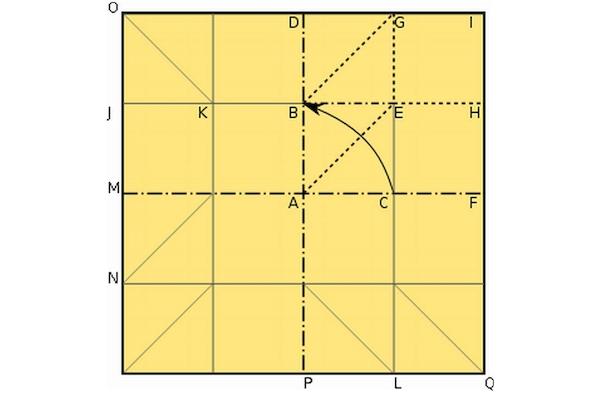
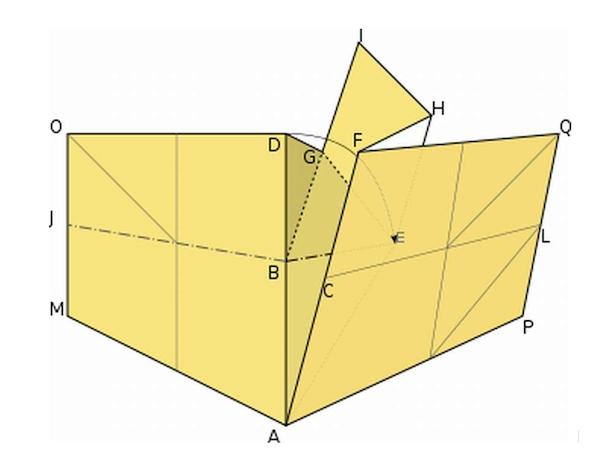
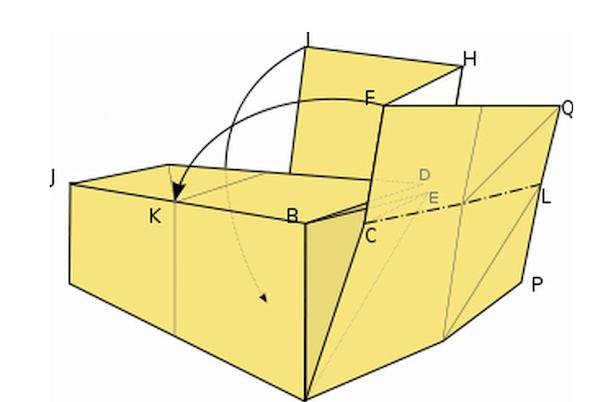
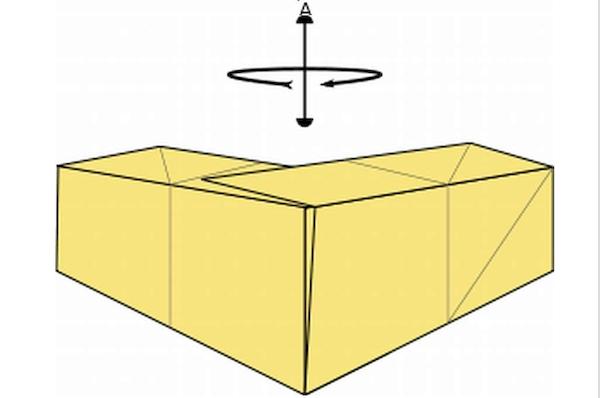
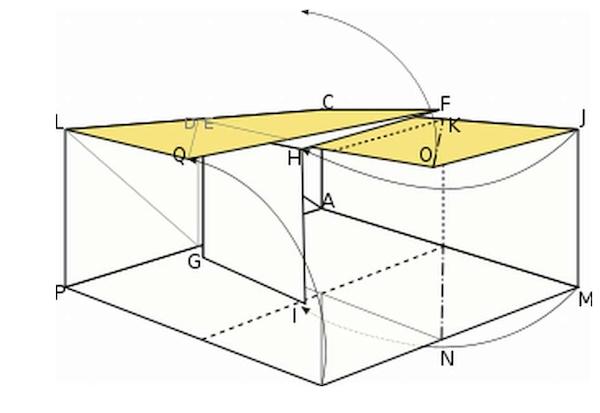
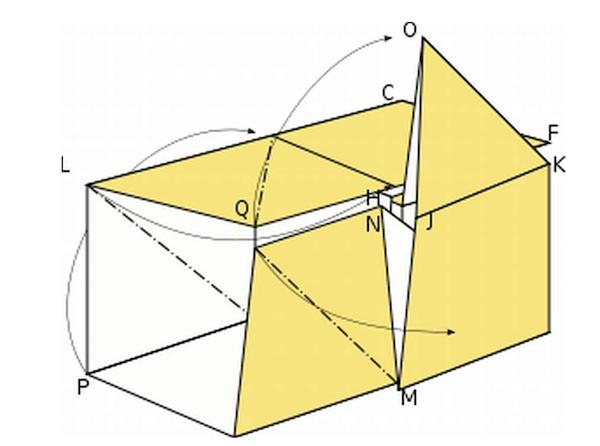
A cube can be made using the origami technique without a drop of glue or scissors. All you need is a square piece of paper. It’s worth saying right away that the folding process will seem too complicated for beginners. But for those who are familiar with the basics of origami, rolling a cube out of paper will not be difficult. Follow the diagram step by step:

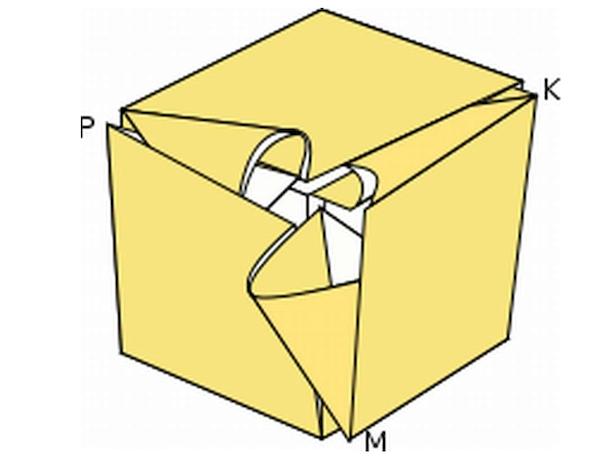
The process of assembling the cube is clearly shown in the video:
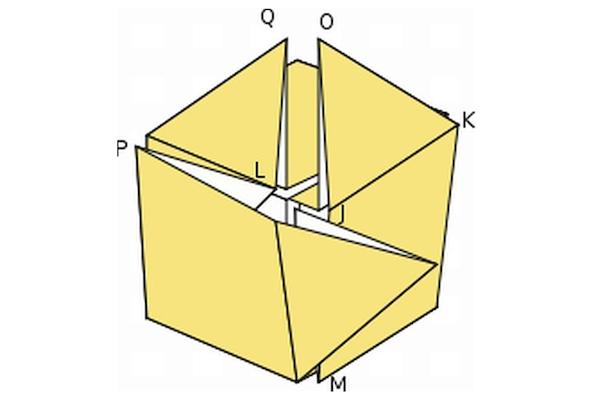
This version of the cube using the origami technique is perfectly smooth, without visible folds or seams. In addition, it holds its shape well.
Here's another way to fold a cube using the origami technique, this time with an opening and closing lid:
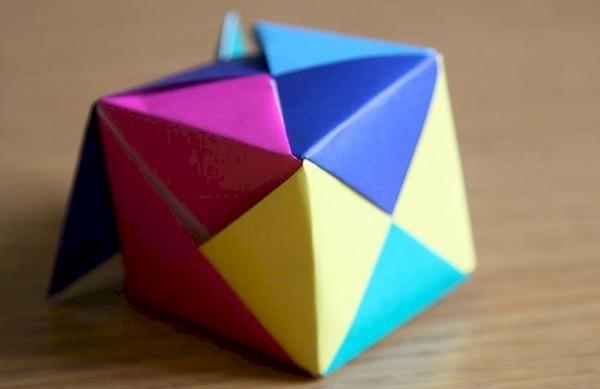
From paper modules
Modular origami differs from classical origami in that the figure is assembled not from one, but from several sheets of paper. Making a cube from modules, especially multi-colored ones, is very interesting. Beginners can try it too. The master class is simple.
Let us describe the entire process of assembling the cube model step by step:
- Cut 6 squares of paper measuring 15 by 15 cm. Use colored paper in different colors. This will make the cube more interesting.
- Make 6 identical modules. Fold the sheet in half and unfold. Fold the edges of the sheet to the fold in the center. Turn seam side down.Fold one and the second opposite corner to the center so that you get a trapezoid. Fold the corners of the trapezoid towards the center on the opposite side. Step-by-step process with photos:


- Collect the cube. First connect two modules by inserting the corner of the first into the body of the second. On the other side, insert another module. Add the fourth edge, then the fifth and sixth, as shown in the photo:


Video master class:
TOP 3 original paper cubes
Unusual paper cubes are very popular among children, with which they can play and perform all sorts of tricks. They are called magical, endless, transformers. To understand why such a toy is original, you need to watch the video.
Endless
“Infinite” is a cube that consists of 8 small cubes assembled using the origami technique. They are connected to each other by paper inserts, which are not visible due to the peculiar pattern. The toy unfolds and reassembles, creating the illusion of infinity.
Video master class:
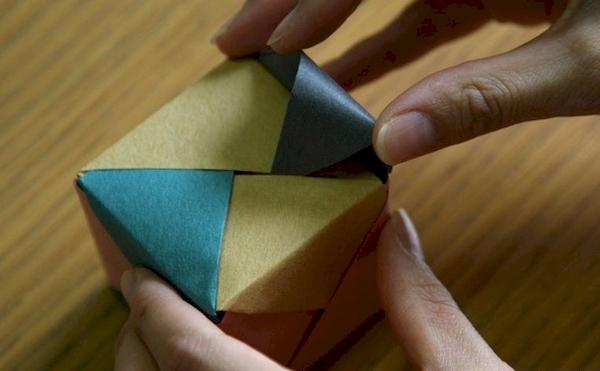
Volume
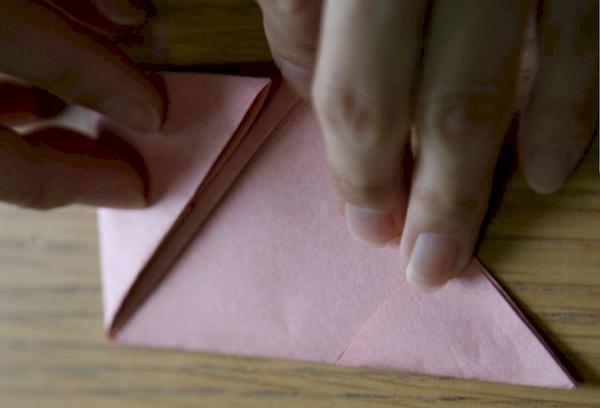
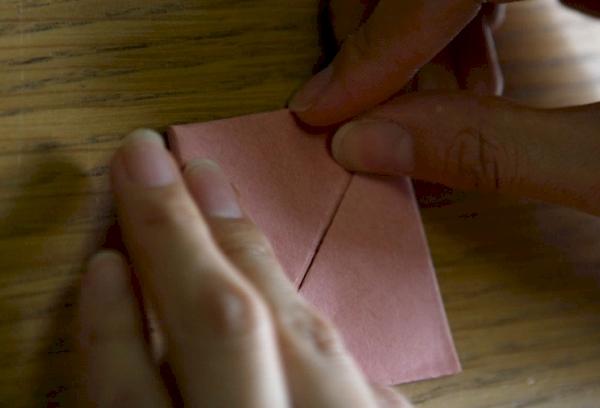
Each face of a cube is a square. Therefore, it is also called a volumetric square or 3D square. You can make a cube out of a square in 1 second by simply blowing on it. But first you will need to master the origami technique and fold a special envelope out of paper.
Video master class:
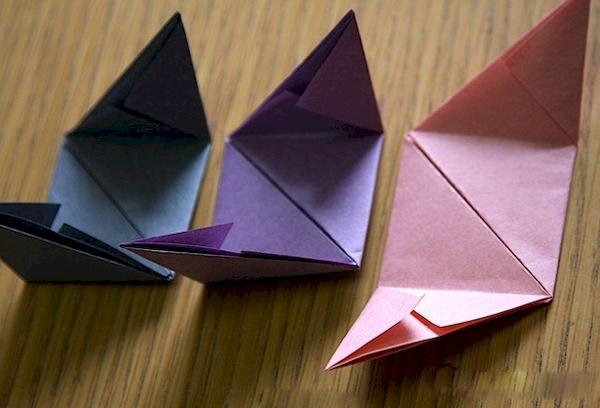
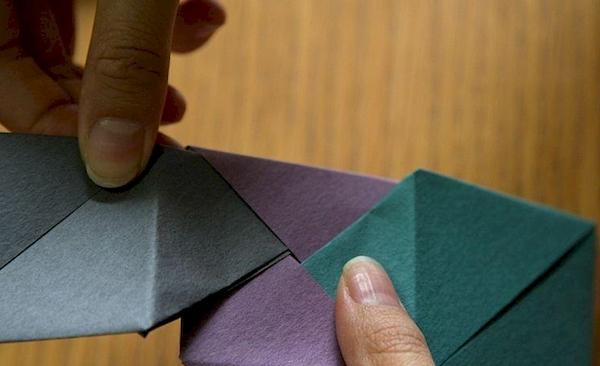
Magic
A cube is known under the name “magic” or “magic”, which is formed from a paper envelope with light pressure. It is also made using the origami technique. A master class on how to make it requires a lot of patience.
Video with step-by-step production:
Secrets and recommendations for production
Making a cube from paper requires perseverance, attentiveness and accuracy in work. To make the paper figure beautiful and even, listen to the following recommendations:
- Do not hurry.Remember that paper wrinkles and tears easily.
- Use a checkered piece of paper to practice. It is easier to draw a drawing and fold origami on checkered paper.
- Choose thick paper or thin cardboard for your layout. From flimsy or, conversely, too thick material, three-dimensional figures turn out sloppy.
- When forming folds and folds, try to avoid errors. Otherwise the cube will be unstable.
The cube is a simple but interesting figure. Children learn to make it out of paper in fine arts lessons and encounter it in geometry. In another way it is called a regular hexahedron. All 12 edges of a cube are equal. It also has 6 faces in the form of squares and 8 vertices. Making a three-dimensional figure from paper requires high precision drawing, even folds and bends. For those who are not ready to spend a lot of time and attention on the craft, we advise you to use a printed scan. With it, the cube always turns out beautiful and even.