How to stop storing thread haphazardly: 10 convenient ways to store spools of thread
Content:
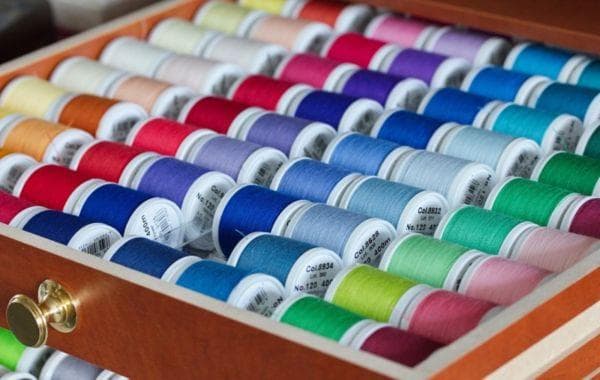
The more often a woman sews, the more different sewing accessories appear in the house. A pressing problem for many needlewomen is how to store threads so that they do not get tangled. Disorder in this matter is unacceptable. The threads can fluff up and get tied into knots every now and then. Not to mention that the coils piled up are inconvenient to work with. The wisest solution in such a situation is to use a storage organizer. You can buy it or make it yourself. We will focus on the second option.
What types of thread organizers are there?
There are a huge number of different thread organizers. Many of them are designed for a specific type of work - embroidery or sewing. Before making an organizer with your own hands, you should think about which option will be convenient to use. Exist:
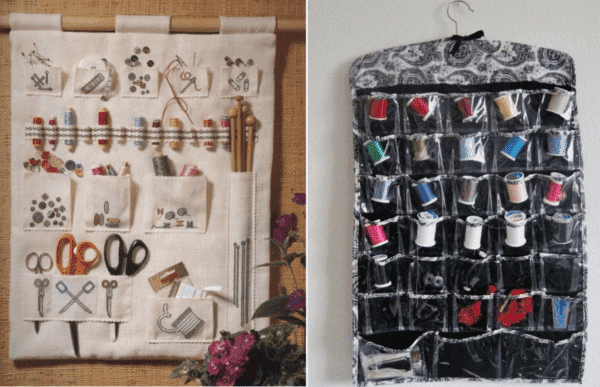
- Hanging pocket organizers. Hang on the wall, interior door or closet door. If necessary, they can be hidden in a desk drawer. The downside is that you have to constantly take out the threads and put them back. It would be better if the pockets on the organizer were transparent.If they are made of fabric, tags should be used that describe the contents.

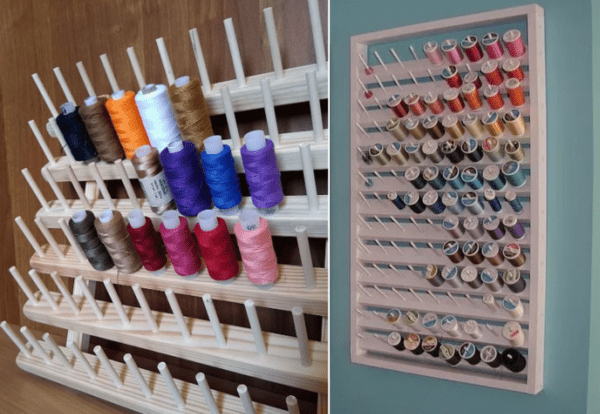
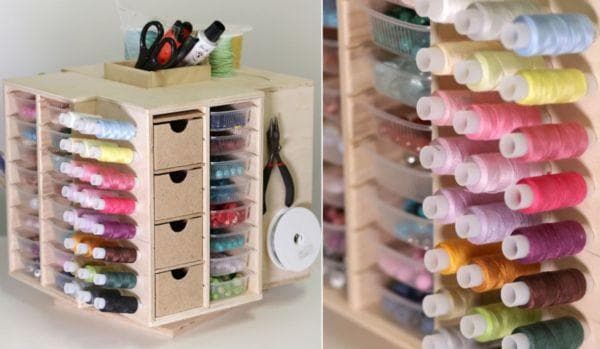
- Shelves and stands. They are convenient to use if the craftswoman has to constantly change the color of the threads or sew often and for a long time. For rare sewing, it is not advisable to choose such an organizer. The threads will become covered with dust.

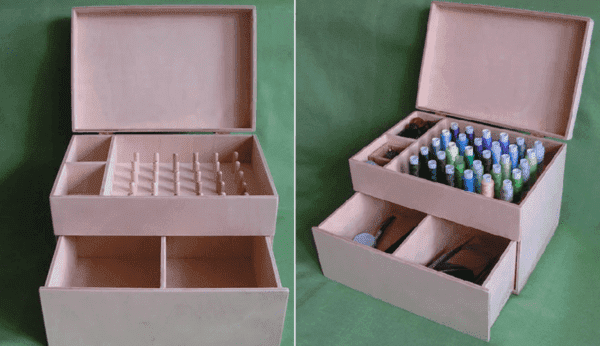
- Boxes and boxes. Universal organizers that protect threads from dust. You can store both floss and sewing threads in them. For this purpose, different separators are used: partitions, spool holders, reels, etc.

- Functional organizers. Such organizers allow you to use threads without removing them from the structure. They can be rotating and contain additional sections for tools (scissors, measuring tape, ruler, etc.).

10 ways to store threads and needles at home
Each craftswoman uses her own thread storage system. What is convenient for one may not be suitable for another. To decide on the choice of organizer, we suggest evaluating different ways to store sewing materials:
- In trays for forks and spoons.
- In shoe boxes.
- In a glass jar with a pincushion lid.
- In wall stands.
- In biscuit or tea tins.
- On the desktop door.
- In organizers made of sleeves or tin cans.
- In a modernized desk drawer.
- In an organizer with elastic bands.
- On clothespins.
We make organizers with our own hands
A thread organizer can be made from scrap materials: boxes, screws, food trays, cardboard. Some organizers are made in 5-10 minutes. There are many different master classes that describe the work in detail. We have chosen 5 MKs, in our opinion, the simplest and most convenient.
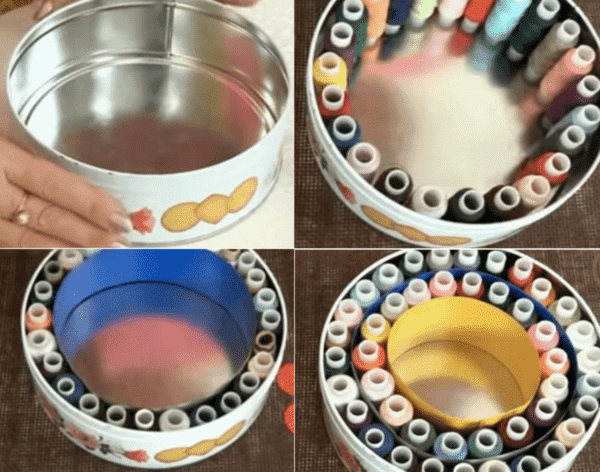
From a cookie tin
This organizer is ideal for storing small supplies of sewing thread (20-40 units).To make it you will need:
- tin round cookie box;
- cardboard;
- scissors;
- scotch.
Progress:
- We place the spools of thread in a row around the circumference of the box.
- Cut out a strip from cardboard. Its width should correspond to the height of the coils.
- We roll the cardboard into a ring, fasten it with tape and insert it into the box. The ring should fence off the inserted threads.
- We expose the next row of coils.
- Cut a cardboard strip of the same width and glue a smaller ring with tape.
- We insert it into the box.
Thus, inside the tin box there will be 3 compartments with threads. They won't get confused.
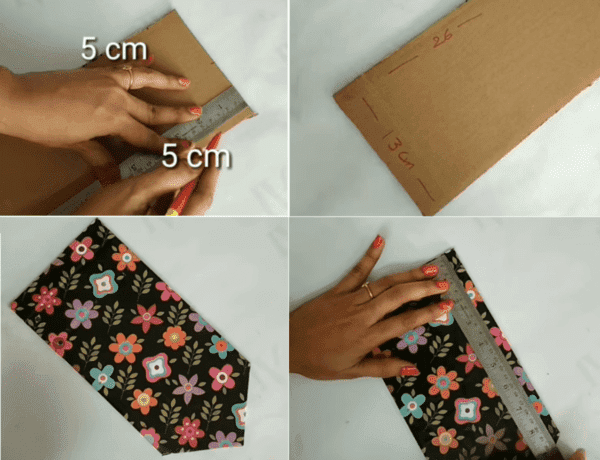
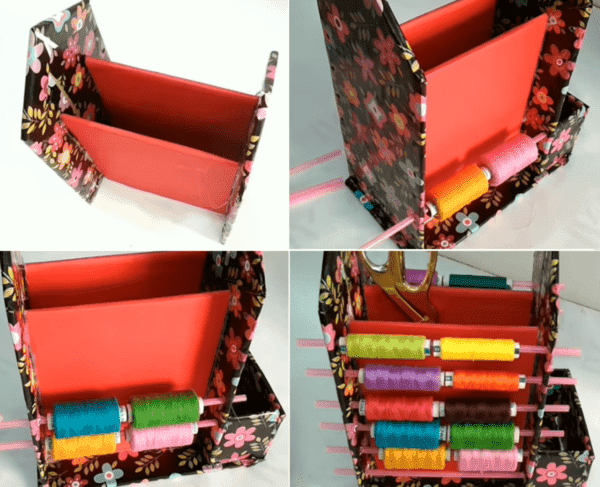
From cardboard
The next organizer is functional. You can store not only threads in it, but also other sewing accessories.
For production you will need:
- rectangles made of thick cardboard - 26 by 13 cm (2 pieces), 18 by 13 cm (2 pieces), 8 by 5 cm (2 pieces), 13 by 8 cm, 21 by 13 cm.
- cocktail tubes – 12 pcs.;
- pen, scissors;
- hot glue;
- hole puncher;
- wrapping.
Progress:
- Take a piece 26 by 13 cm. Measure 5 cm along the long side. Make a mark with a pen. Draw a line from the center of the narrow side to the mark. We cut it off. On the other hand the same thing. The result should be a part pointed at one edge.

- We repeat the same with the second part.
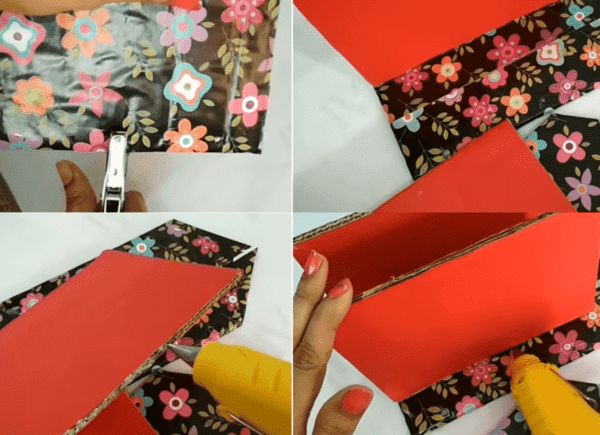
- We wrap all the parts in paper. Rectangles 18 by 13 cm can be made in a different color.
- On the pointed parts, we punch holes at the edges in increments of 3 cm.
- Using glue, we assemble the organizer, as shown in the photo:

- Insert tubes of thread into the holes made. Trim the edges of the tubes.

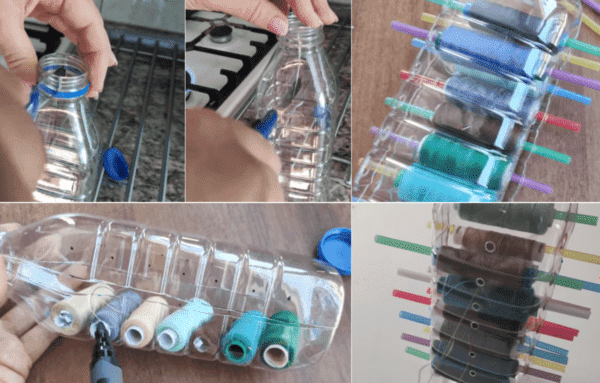
From a plastic bottle
Simple and easy to use organizer for 14 spools.
To make it you will need:
- square plastic bottle;
- stationery knife;
- nail;
- pliers;
- hook;
- cocktail straws – 14 pcs.
Progress:
- We start by dividing the bottle in half lengthwise with a hot utility knife. We don't touch the bottom.
- Now the bottle opens easily in the middle. We lay it on its side. Open and place 7 reels in a row.
- Opposite each we make holes on both sides. We use a hot nail held with pliers.
- We insert the tubes into the holes (thread them through the coils).
- Turn the bottle over to the other side. We lay out the remaining 7 spools of thread in a row.
- We make holes and insert the holder tubes in the same way.
- On top opposite each spool we make holes for the threads. We hook them with a hook and take them out.
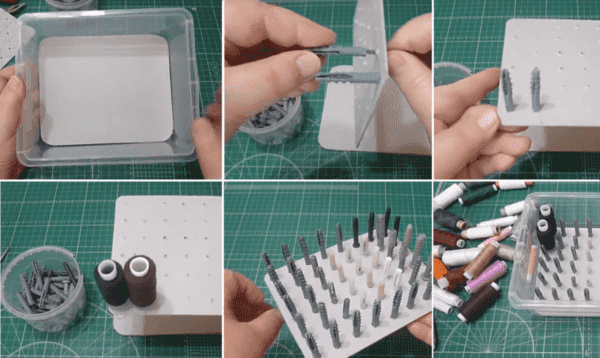
From the food tray
A neat homemade organizer made from a food container will last for many years. It can be washed. The threads are clearly visible, do not get tangled, and are easy to remove and put back in place.
What materials will be needed:
- Plastic container;
- 2 sheets of thick cardboard;
- awl;
- screwdriver;
- self-tapping screws;
- dowels;
- Ruler and pencil;
- scotch.
Progress:
- Cut out 2 rectangles from cardboard to fit the bottom of the container.
- We draw one of the cardboards into 3 by 3 cm squares.
- Punch holes in the center of each square with an awl.
- We insert the screws and screw them into the dowels.
- Place the second cardboard on the side with the caps.
- We fasten the cardboards with tape.
- We insert the structure into the food tray.
- We place spools of thread on the dowels.
Large wall stand made of metal mesh shelf
A good-quality wall stand is a dream for craftswomen who often have to sew. It can be made from the following materials:
- metal mesh shelf;
- long dowels;
- wire cutters;
- hot glue;
- wall mounting system.
Progress:
- We bite off the metal rods on one side at the base of the crossbar.
- We bend it towards ourselves.
- Coat the hole in the dowel with hot glue and attach it to the rod.
It turns out to be a beautiful and neat stand. The cost of all materials will be no more than 1000 rubles.
Questions and answers
How much do special thread organizers cost?
From 250 rubles for soft ones with pockets to 25 thousand rubles. and higher for stands.
How to store duplicate thread numbers?
Any container or box is suitable for “spare” threads. To prevent the threads from getting tangled, distribute them into transparent zip-lock bags.
Making a thread organizer with your own hands is definitely more profitable than buying one. If you use available materials, it will cost 0 rubles. In addition, it can be perfectly adapted to your needs - adjust the size, number of compartments, etc.