15 minutes: assembling an original key holder from a LEGO set
From time to time I feel like making something like this. I've been eyeing Lego crafts for a long time. But for now I decided to just make a key holder. I almost didn’t have to work with my own hands - the children picked up the idea. It is done in 15 minutes at most (the easiest option).
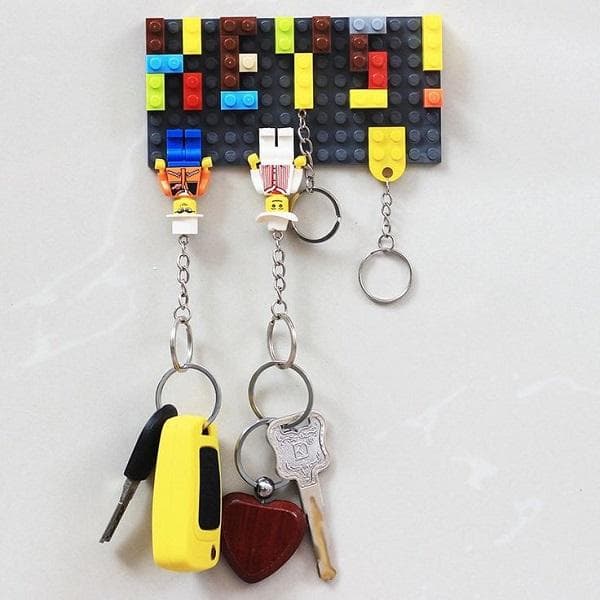
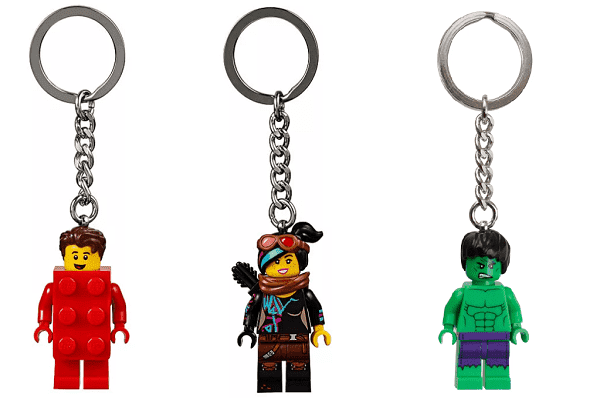
Not only a key holder, but also key rings for the whole family
One day a friend of our son visited us. He threw the keys and phone on the pouf in the hallway. My gaze accidentally fell on a bright keychain. “Is it such a fashion now, or what, to use Lego parts as a keychain?” – I asked. The boy said it's not about fashion. This is a special keychain for the key holder that hangs in their home. It is also made from a construction set. You just attach the keychain to the key holder and that’s it.
Wall-mounted key holder made from a designer
The idea interested me. I immediately started surfing the Internet. It turned out that such key holders have been around for many years. Here's what they make from Lego in America:
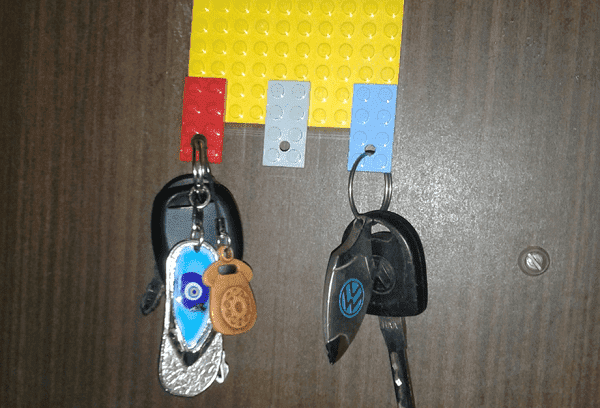
Simpler options:
What else can you make a key holder:
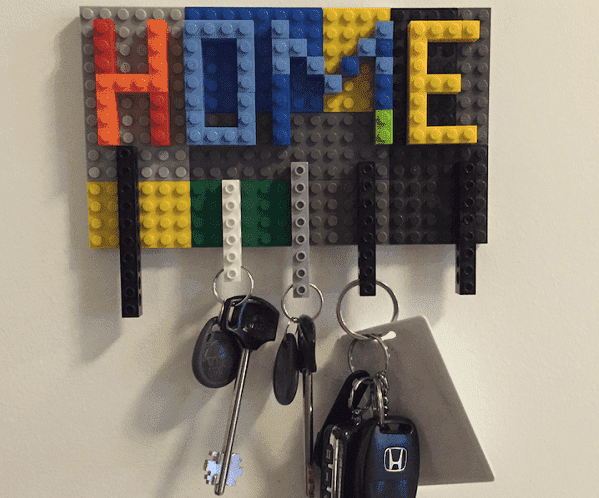
- With the inscription “House”, “Keys” or with the apartment number:

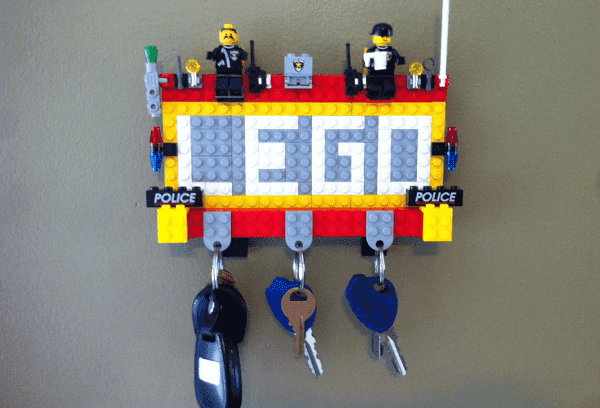
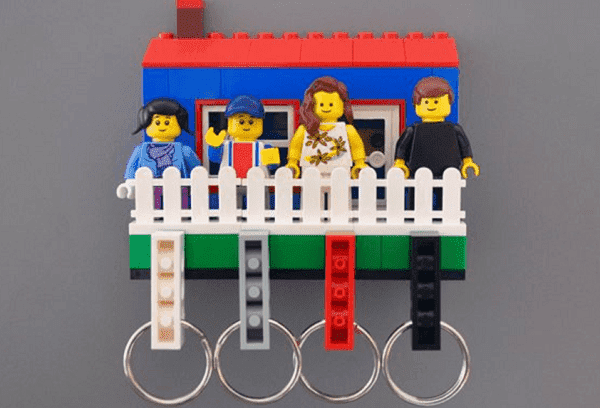
- With figures of people or favorite characters:

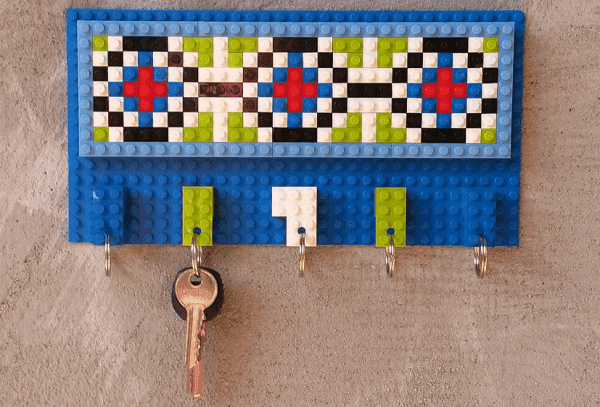
- Some abstract pattern:

- With your house layout:
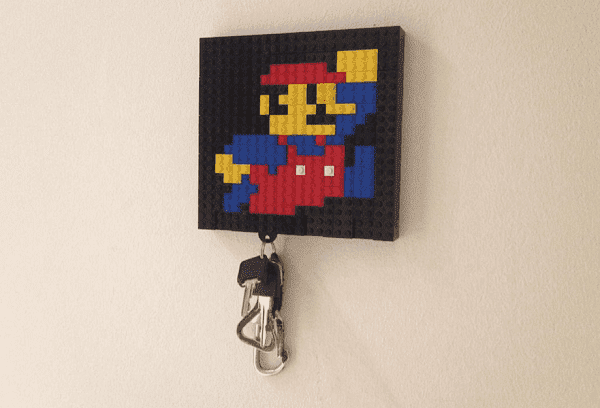
- Wall key holder-picture made from Lego:
- Both key holder and wire holder 2 in 1:

How to make a key holder from Lego?
I didn’t bother and chose the simplest version of the key holder. To tell the truth, there were doubts about how these keychains would hold up. Will the keys fall off under the weight? But they were in vain.The key holder and keys never fell. This is taking into account the fact that the entire structure is held on by tape.
I didn't hang it on the wall. It’s trivial that there is no one to drill a hole. The wall is concrete, you can't hammer a nail into it. Therefore, I attached the key holder with double-sided tape to the wall of the closet in the hallway.
I’ll tell you how I made the key holder step by step:
- I took a rectangular platform from a designer. I chose beige because my furniture is light.
- I pasted double-sided tape around the perimeter of the platform (on the back). I did not remove the protective strips on the back side.
- I attached it to the closet wall in a place that I like. I circled it with a pencil. I stepped back to make sure everything was smooth.
- I removed the protective tapes and attached them to the intended location. All. After that I started working on keychains.

How to make a Lego keychain
When I told my friend about the new key holder from the construction set, she was surprised: “And how did the children part with Lego so easily, especially with the platform?” At first, I also doubted whether they would approve of my plan or not. I thought I could get out of it by gluing the ordinary parts together with superglue. But when I explained to the kids what I was going to do, they liked it. It seems to me that they were captivated by the fact that you can make a keychain yourself from any detail.
How to make keychains for a key holder from Lego:
- Just. Take any detail you like, a thin nail, pliers. We clamp the nail with pliers. We approach the switched on stove. Heat the cloves. We apply it to the part, retreating 0.5 cm from the edge. The hole is burned out. It is better to do this part of the work yourself. And even children can insert the ring from a bunch of keys into the hole.
- More complicated. You will need a Lego piece in the form of a box (block and lid), superglue, a knife with a sharp end and a self-tapping screw with an eye.Use a knife to dig out a small indentation on the side of the block. Insert the screw and tighten it. Glue the block with the lid, spreading glue on the round protrusions. Insert a ring into the eye of the self-tapping screw.
Or you can insert self-tapping screws into the hats of the figures, and then glue them to the head. This is what it will look like:
I must say that the main ideas were gleaned from a video on YouTube (attachment with tape, key rings-boxes). I hasten to share it. I know from myself that sometimes it is better to see once than to read a hundred times:
This is our first key holder in the house, and so far I am very pleased with it. Before this we tried to store the keys in a box in the hallway. But the ligaments were constantly tangled with each other. Children often left their keys in their pockets, or took mine (confused). And now everyone has a keychain of their favorite color. Very convenient: I opened the door and immediately attached the keychain to the key holder. Nothing gets confused or lost. Yes, and she looks decent. In a modern way.