How to make a New Year's wreath with your own hands from pine cones and branches step by step on the door
Content:
Winter holidays are approaching. To make them fun and atmospheric, we recommend decorating your home. We will tell and show you how to make a New Year's wreath with your own hands from pine cones and branches step by step. You can hang it on the door using a suction cup towel hook, tape, wire and fishing line attached to the eye. 20 minutes and the decoration is ready!
How to weave a wreath from branches and pine cones in 20 minutes?
The simplest, fastest and most beautiful wreath is made from natural materials. A child over 8 years old can easily handle its production. All you need is:
- fir branches;
- cones;
- sewing thread (green or brown);
- the base is a volumetric circle.
Basics for New Year's wreaths are sold in craft stores. They come in foam and straw. You can make the base yourself:
- Cut from foam plastic.
- Cut it out of cardboard and increase the volume with newspapers.
- Roll the insulating pipe (foam) into a circle.
- Form a circle of hay and cling film.
- Roll up a circle of willow or birch branches and tie with thread.
Threads should be thick and resistant to fraying. You can fold them 2-3 times. If you have floral tape in your house, that’s even better.It is much more convenient to work with it.
Step-by-step instruction
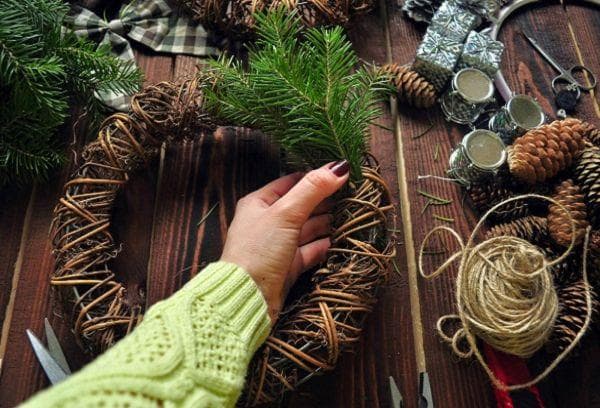
The principle of making a Christmas wreath from live branches and pine cones is simple. We wind them to the base with threads, moving in a circle.
The branches are applied to the base one by one, overlapping. Each is secured with threads. The cones are tied by wrapping them with thread closer to the base.
Step-by-step manufacturing instructions:
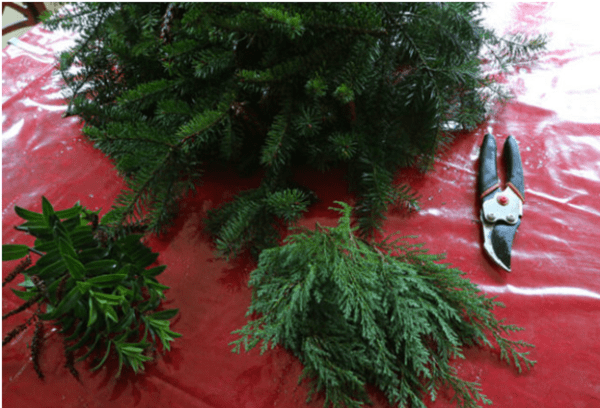
- Prepare your materials. Additionally, you may need scissors or pruning shears. The branches should not be longer than 20-25 cm. It is better to use flexible and soft tops. Chop them if necessary.
- Consider whether you will decorate the wreath only with pine cones. You can weave beads, New Year's balls, bells, bows into it. Place the decorations around the base as they will be placed on the wreath.
- Decide in which direction you will weave the wreath - clockwise or counterclockwise. The direction is not particularly important. The main thing is that the tops of the spruce branches look in one direction.
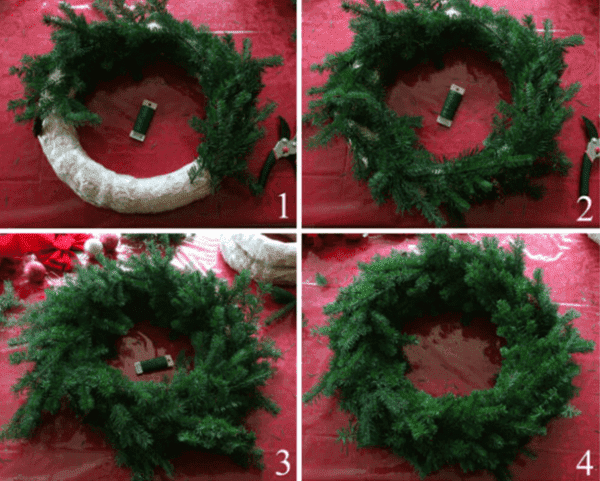
- Attach the first spruce branch to the base. Tie with thread. For better fixation, wrap the thread 3-4 times in a spiral. Don't cut off the end.
- Attach the second branch to the first branch, overlapping it. Make 3-4 turns of thread.
- Wrap branch by branch, moving in a circle in one direction.
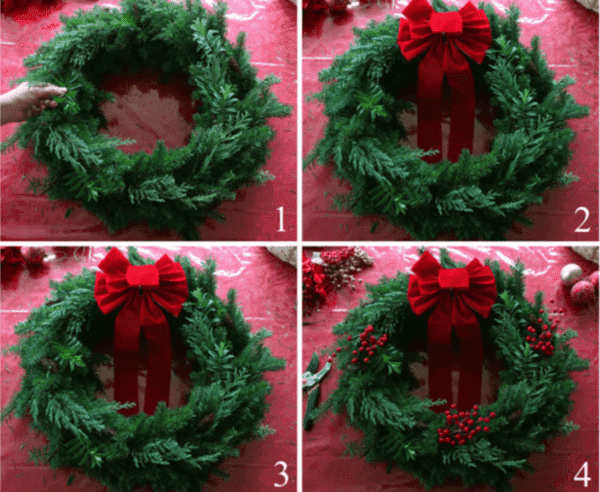
- Don't try to fill all the voids at once. It is better to place a second circle of fir branches on top of the first. The wreath will turn out lush, and the supply of branches will be distributed evenly.
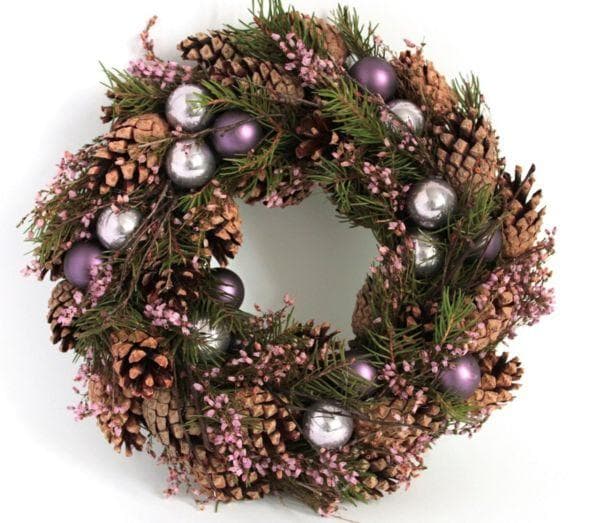
- Make a third circle of pine cones and decorations. Wrap them with the same threads. This way the branches and decorations will be securely tied and will not fall off.
Place branches only on the front of the base. The back of the wreath should remain flat so that it can be easily hung on the door.
Wreath Decoration Ideas
Christmas wreaths are decorated with many different things.New Year's balls and bows are the simplest thing you can find.
Everyone knows that living spruce exudes a bright, pleasant aroma. It is perfectly complemented by the smell of cinnamon and citrus. At the same time, spices serve as decoration. Figures are cut out from the peels of oranges and tangerines - stars, Christmas trees and others. You can dry lemon slices and hang them on a wreath on a string.
A finished wreath is a great opportunity to experiment and express yourself creatively. You can come up with your own decor, hang gingerbread on pine needles, make toys from felt, thread, and other scrap materials.
The New Year's wreath can be hung not only on the door, but also on the wall. They decorate false fireplaces, place them on shelves and place them in the center of the festive table.
Advent wreath
The Advent wreath has its own interesting story. Its prototype is the Advent wreath. Back in 1893, Lutheran theologian Johann Wichern decided to brighten up the Christmas holiday for his little pupils from poor families. He took an old cart wheel and braided it with fir branches. Between the needles he inserted 20 small red candles and 4 large white ones.
On the first of December, he and the children lit the first candle. On December 2, they already lit two candles. Every morning, the inhabitants of the house rushed to the table and performed the ritual with bated breath. Red candles were lit on weekdays, and white candles on Sundays. And so on until Catholic Christmas.
Advent is the name of the pre-Christmas period adopted by Christians of the Catholic Church.
The four white candles lit on Sundays have a symbolic purpose. Each has its own name.
- On the first Sunday of Advent, the Candle of Prophecy is lit.
- On the second Sunday, along with the first candle, the second, the Bethlehem candle, is lit.
- On the third Sunday of Advent, three candles are lit in homes - the Prophecies, Bethlehem and Shepherds Candles.
- On the last, fourth Sunday, all four candles are lit. The fourth candle is called the Angel candle.
When the last candle remained, all the children understood that tomorrow was Christmas. How much joy they had, and what sweet dreams they had on the night before the holiday!
How to do it yourself?
Nowadays, the tradition of making an Advent wreath on December 1 has been preserved, but has undergone slight changes. Instead of 24 candles, 4 large candles are now inserted into the needles. Only in some places, for example, in St. Michael's Church in Hamburg, full large wreaths are lit.
At home, such wreaths are made according to the following principle:
- Fir branches are woven into a wreath.
- Decorate it with ribbons, pine cones, and New Year's toys to suit your taste.
- Candles are placed in the center. Sometimes small tin candlesticks are used, which are hot glued directly to the wreath.
To prevent fire, the Advent wreath should be kept on a tray away from curtains and other objects that quickly catch fire. You need to keep an eye on the burning candles, and when everyone has had enough of the spectacle, put them out.
How to make a simple tinsel wreath?
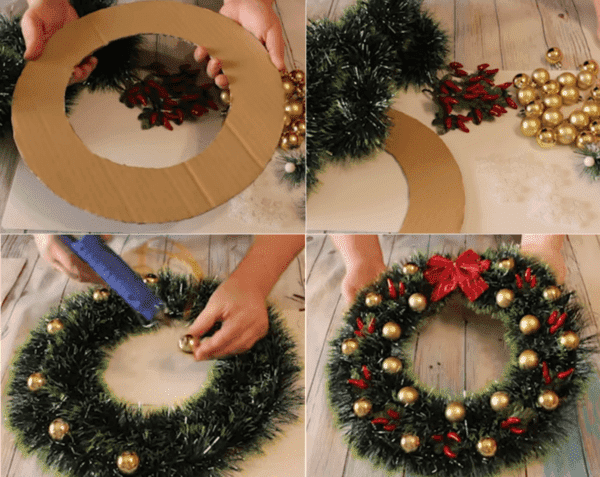
Not everyone is able to find live spruce branches for a wreath. It's not a problem. You can make a New Year's wreath from tinsel. Although it does not smell, it does not prick. Doing it yourself is both faster and more enjoyable. If you choose thick green tinsel, the wreath will look like a real one. And it can be used for more than one year. Tinsel needles do not turn yellow and do not dry out, unlike real ones.
New Year's wreaths are made from tinsel in different ways. The simplest thing you can do:
- Draw a circle on cardboard.
- Draw a circle of smaller diameter inside.
- Cut out.
- Tie the base with a beautiful ribbon, making a loop for hanging on the door.
- Glue one end of the tinsel to the base.
- Wrap around cardboard.
- Glue the other end of the tinsel.
Christmas balls can be glued with hot glue to a cardboard base or strung on tinsel. Craftswomen also use inexpensive Titan glue for gluing.
Step-by-step instruction
To make your New Year’s wreath neat and “alive,” we suggest using the following master class:
Making a Christmas wreath from tinsel step by step:
- We prepare the materials: 3.5-4 m of green tinsel, a sheet of thick cardboard 65 by 65 cm, thread, ruler, pencil, stationery knife, glue, 19 small plastic balls, 9 branches with artificial berries, a large bow, ribbon for a loop.
- Let's make a donut base. Place a dot in the center of the cardboard. We measure and cut two threads - 20 and 30 cm. We attach one end of the thread to a point. With the other hand we take the opposite end of the thread and a pencil. Pull the thread and draw it in a circle. We repeat the maneuver with the second thread. Cut out the donut base.
- Apply a strip of glue around the circumference of the donut along the very edge. Glue the tinsel in a circle.
- Draw a second strip next to the first with glue. Glue the tinsel. You will get two rows.
- We move the tinsel apart and glue the balls to the cardboard. Then - beads. Distribute the decorations evenly around the circle.
- We tie a ribbon loop to the base.
- We glue a bright New Year's bow under the loop and hang the wreath on the door or wall.
You can decorate the Christmas wreath with a garland. Blinking in the dark, it will look especially festive and magical.
Questions and answers
Question: How else can you quickly and easily make a wreath from live spruce branches?
Answer: In addition to wrapping with threads, spruce branches can be secured to the base with double-sided tape or glued with hot glue. But you need to warn that they will hold on worse than when using threads, and may fall off.
Question: How many twigs do you need to make a Christmas wreath?
Answer: A wreath with a diameter of 40 cm requires approximately 100 small branches. You can use not only spruce or pine in your work. Add twigs of thuja, oak, cypress, juniper, rowan and viburnum to the wreath.
Question: Where can I get fir branches and cones to make a wreath?
Answer: Fallen cones and broken branches can be found under trees in a forest or park in winter. Small branches can be bought for a nominal fee at the market from sellers selling Christmas trees.
Making a Christmas wreath with your own hands is a beautiful and good tradition, borrowed from Catholics. It can be made from different materials: Christmas balls, tinsel, felt, willow twigs and much more. If a spruce grows in your yard, the most inexpensive and simple wreath is made from live branches and cones. Its only drawback is that the needles can quickly turn yellow and fall off. The pine will lose its appearance in about 3 weeks. A spruce wreath can remain green for up to 2 months. But it is better to keep it in the cold on the outside of the door.
